Menu
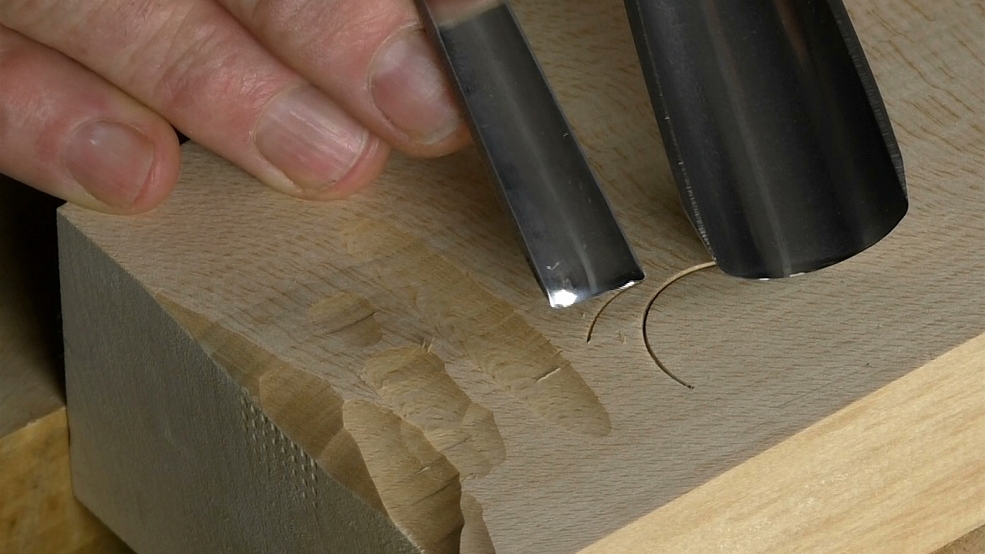
Students often ask, 'What tool do I need?', as if a tool only does one cut. Sometimes an exact cut is what you need but mostly that precision is not what you need to be thinking about. Here's the thing: Any tool can make a whole array of cuts, will have different 'outcomes' depending on how you handle it. If you look around the projects on Woodcarving Workshops, you'll see me continually adjusting the tool according to what I'm trying to do - and I hardly know I'm doing it.
In this summary workshop I will take a simple, common tool (#6 x 1/2in. 14mm) and show you a variety of different outcomes and things to think about.
You bought one cut? Think again!
Get some wood and a similar tool, pause video at any point - and play. Play. Get to know your tools. You need to be so familiar with them that they become extensions of your hand.

| 25 September 2022 07:17
Henk - Yes, it can be a bit of an issue getting the wood you need for the sort of tool-cut-driven carving I do, as opposed to what you need for joinery, sculpture or such, but it is out there, though the ease with which you can get it will depend on where you live.
Start by searching online for 'specialist hardwood suppliers'. Also ask woodturners' and carvers' suppliers - those who might also sell tools. And look for local carvers through the Woodcarvers Associations who might have solved the problem already. What are your other carvers using?
As for alternative wood to Lime: Jelutong, Brazilian Mahogany and Birch are good. I have used Tulipwood but (as with Birch) it wants to be the most dense (heaviest), clean and tight-grained timber you can get.
Bottom line you'll have to try any different woods available to you to see what happens.
You don't need a lot; we carvers can make a little bit go a long way. And you always want to buy more than your immediate need to build up a little store for the future.

| 24 September 2022 16:51
Help full information Chris. I assume you are working in this sample with lime. However I find it very difficult at the moment to get hold of lime. Do you have the same experience? As I like to carve fine details and micro carving, I like your advice for an alternative for lime. May be Tulip is an option? Are there any other wood varieties?
| 15 January 2019 12:24
John - It's a little out of my field here; I would usually carve something and leave the issue of fixing and staining to the restorer.
I believe normally appliques are fixed with glue and/or discrete pins to a naked or 'keyed' wood surface. Whether the staining is done before or after, or both, is moot. I would guess before certainly then a touch up once the piece is in position with all the surrounding colour and patination.
Hope this helps!

| 14 January 2019 17:08
Hey Chris, thanks for this video :). I was wondering, however, what's your method for applying appliques on painted surfaces when you want the applique to remain stained? I've been having a lot of difficulty figuring out applique process post-carving. Thank you so much,
Jd