
Menu
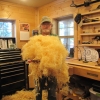
Here's a really good way of getting your head around complicated relief carvings.
Although I show you the method rather formally here, towards the end of the workshop you'll see me scribbling and talking to myself. That's the way to do it.

| 23 December 2018 10:22
Eric, thanks for the suggestion - I will indeed mirror the video in the relief carving section.
When it comes to the lines, draw them whenever and wherever you are confused or need more confidence!
| 20 December 2018 17:53
Sorry to be a hog on commenting on this technique, but I had another suggestion. How about the idea of doing the cross section twice, at 90 degrees, in critical areas to help see how things blend in from up to down and right to left on a carving? Have you done that before? I am thinking of your boat on the shore relief carving where you developed extreme depth of field in such a small depth using perspective techniques. I really want to experiment with this technique, as relief carving has been a scary "black box" for me. Eric
| 20 December 2018 17:49
Chris... Boy do I relate to this issue!! If you remember the time you might have seen my one inch deep relief Oseberg carving I was working on, it had seven layers of intertwining vines and animals and I had to figure out what each layer would be like as I navigated through the carving. Oh how I wish I had had this lesson. Still a big challenge, but this would have given me more confidence. I basically had to do it in my mind, but it would have helped to have some mileposts along the way. Suggestion: Dual post the link to the video in Relief Carving menu. Too valuable to get lost in the techniques section for relief carvers. Thanks, Eric

| 20 December 2018 15:26
This is an amazing hint to depth of carving. Not sure how I missed this earlier.
