Menu
While the shirt is turned over, there are 2 important jobs to be done:
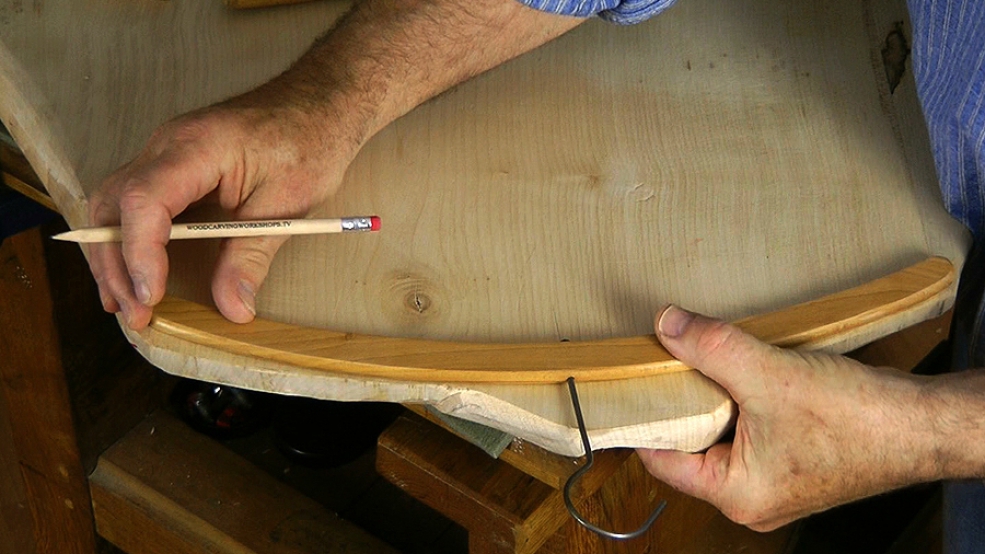
1. Setting the line of the hanger. One of the best comments I ever had about another carved shirt was, 'How did you get the hanger in there?' The hanger is of course carved from the solid block of wood and we have to start sneaking up on it now by adjusting the shoulder line.
2. Fixings to hang the finished shirt. Now is the time to think about how the finished carving will hang on the wall. It doesn't hang by the hook on a nail; that's a faux effect. Rather, it hangs on 2 'keyhole' escutcheon plates that lock the carving securely to screws in the wall. The plates must be sited carefully. I use two because the shirt could be knocked as it hung and could pivot on just one fixing, potentially ripping out the metal hook from the hanger.
Feel free to invent another method - and be sure to let me know!

| 09 December 2013 19:19
Robert - The hanger is a brass 'escutcheon' plate, actually used for covering keyholes. Google images of that and you should turn a supplier up. The trick, though, is to match the diameter of the plates to a 'Forstner' bit; that way you can recess them into the back of the carving really easily. You still need to excavate behind the keyhole itself to allow for the wall screw. We need a video on this!
| 08 December 2013 18:40
i have been looking for the brass hangers you use in this episode and cannot find them what is your source for them