Menu
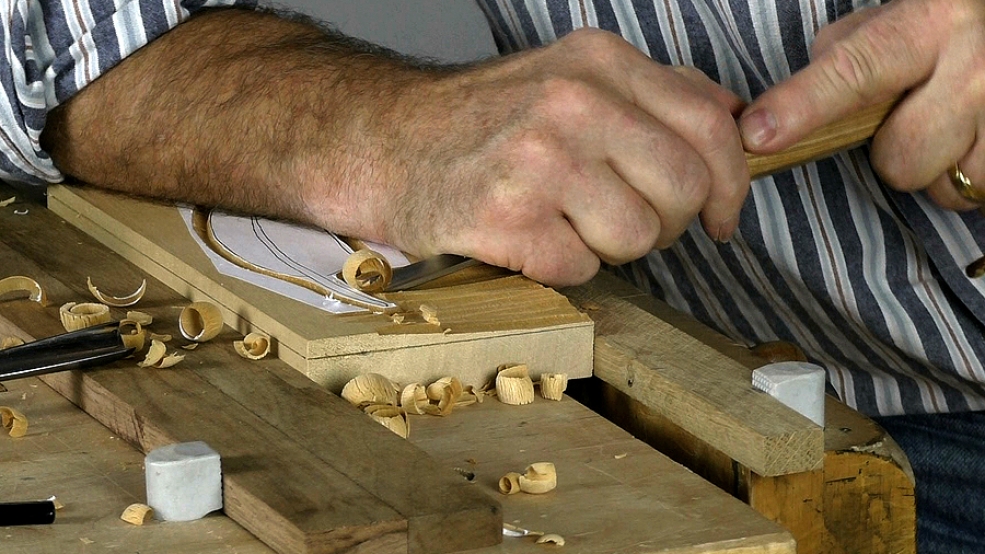
The background: removing the waste wood accurately to the level we want and smoothing it over. As we go along I'll recommend another, generally useful tool for speeding up wood removal.
There are some terms you need to be clear about:
Here the thing: when we are carving along the grain we can't see the fibres below, and they often don't grow in a neat straight line! Often they will be rising to the surface. So:
Now for the nugget of gold. Well, two actually:

| 04 April 2024 21:14
Bill - Depending on the direction in which the fibres are cut by slicing, parts of the surface can look shiny and other parts a little grey. I think that's what's happening, assuming you are cutting cleanly, and all should disappear with waxing.

| 01 April 2024 01:26
Hi Chris, I was smoothing the surface of the background a bit more a few days after looking at it in daylight. In places that I resurfaced and refined, I see a different sheen on the surface although I am using the same flat gouges with a slicing cut. Just curious what does that? It doesn’t happen everywhere.
Will it disappear after beeswax finishing?
Bill
| 27 July 2019 15:53
Imram - The wider gouge will give fewer of these slight finishing facets. Do remember that the corners should never dig in with this slicing/smoothing cut, no matter what the width.

| 27 July 2019 08:58
Thanks Chris. I assume with the wider width, the slicing cut might be smoother, as there is there is more flat area before the corners dig in. Not been carving long enough, maybe the slice would be just as slick with the less wide gouge given practice.
| 27 July 2019 05:15
Imran - The wider flat gouge I use (at about 08:30) in the video is 3/4in. (20mm). I'm making the, probably obvious) point that the the wider gouge here, the quicker the flattening of the background.
The 3/4in. (20mm) is a good size, but I will go up to 1 1/4in (30mm) sometimes on bigger work.
| 26 July 2019 04:47
Chris. The larger flat # 3 gouge you show, what size is it? Thanks
| 06 January 2017 09:12
Wynne - Now you know why I don't carve very hard wood. It's very hard work!
Mostly, the carving woods I use, even Oak, are readily carveable. Really hard woods are better for sculpture with polished surfaces, rather than being left tooled. Be that as it may I have a few suggestions on how to proceed:
'Plough' the background again with the #9 but carefully run the cuts along the existing ridges, reducing their height. You can still use the mallet.
Then I think the best thing is not to go from the #9 to the #3 but have at least one intermediary sweep, say a #6. You can use the mallet or just quietly make short cuts by hand, 'rocking' the tool through the cut (I describe this in the Beginners section). Then you are down to the flat gouge and at this stage should should just be looking to lightly skim the surface by hand with short slicing cuts.
With a really hard wood you probably need to add more inside bevel to strengthen the long/low outside one.
Hope to see your feather in the gallery!
| 06 January 2017 05:24
Smoothing the background with a hard wood?
Hi Chris,
I started a feather for a friend's birthday. Picked wood that is even grained, will take detail BUT is quite hard, way harder than lime, like oak (no idea what it is, from the very old 'someday' pile).
I've taken the background down using #9 and mallet, ready to start smoothing. Definitely can't smooth without the mallet but I've not tried that before. I've gotten used to mallet-less smoothing. Any hints or suggestions before I just try to puzzle it out would be *greatly* appreciated.