Menu
Step 3: Set the Keel

| 20 December 2020 21:27
John - The way I've set this series of workshops out is that you've need to have the tool looking exactly as I have it at the end of each stage, before passing on. Don't miss any steps!

| 20 December 2020 21:09
Thanks Chris. I have seen the conical video, and I will keep plugging away until
I get it. I think I am getting close as my v tool is starting to make small cuts.
I watch the videos over and over to see what steps I may have missed. Much appreciated!
| 20 December 2020 12:08
John - You joke but I've actually seen this done! Sharpening is a skill and not necessarily to be learned in a day. A shortened tool is one that has been your help in learning - worth every moment and penny!
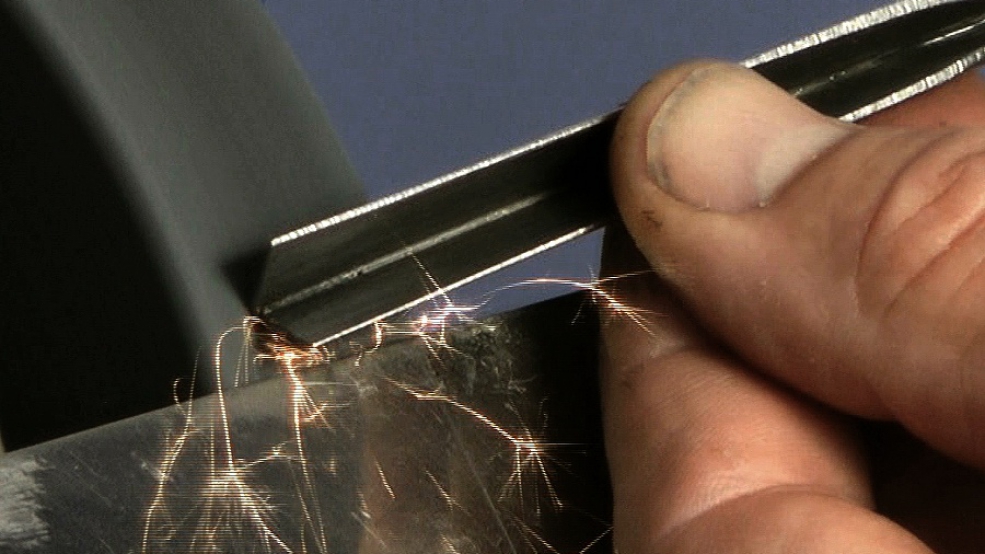
Keel: You can see a bottom view of my keel-work from about 00.55 secs. The length of the keel depends on the thickness of the metal. Also, if you look at the 'Correcting a Conical Keel' lesson, you'll get a good sense of how slender the keel should be, merging with the side chisels.
Keep going, sedulously, step-by-step and you'll get it. We all had to!
| 19 December 2020 18:35
Hi Chris,
New to carving. To say I had a problem sharpening v gouge would
be an understatement! Gouge was approximately 5" long when I started,
it is now about 1-1/2". LOL
Just teasing, but I am watching the videos over and over so I can
hopefully get the hang of it. I think it might help if I could see how the
bottom of the keel should look when it is finished. Thanks
| 24 February 2016 00:20
Thanks for keeping me connected w. your carving lessons. I had to take a few months off for other things but I'll be back.
| 24 September 2014 09:41
William - You can see a bottom view of my keel-work from about 00.55 secs. The length of the keel depends on the thickness of the metal. If you look at the 'Correcting a Conical Keel' lesson, you'll get a good sense of how slender the keel should be, merging with the side chisels.

| 22 September 2014 18:45
It would be helpful to me if you showed the keel full on from the bottom view. I'd like to see how narrow you make the keel and how long the keel is relative to the side bevels. Thanks.
| 18 June 2013 19:32
Eric - Thanks for that. I've mirrored the conical keel problem at the start of the sharpening so hopefully that'll help others.

| 16 June 2013 14:25
Chris, I just found the "Correcting the Conical Keel" video (at the bottom of the sharpening menu). Duh? Just what I need. Suggest you have your web people double post that link in the "Sharpen Your V-Tool x8" section so dense users like myself can find it more easily. Back to the shop to sharpen.
| 16 June 2013 14:13
Chris,
I followed your directions for the V-tool with great success, except for the keel. It does end up conical, the larger the V-tool, the larger the conical section. It makes the tool almost unusable (no control, binding in the bottom of the groove). It is a Pfeil chisel, which is a good brand, but are there some chisels that cannot be sharpened to a V? How to you get the "V" without a) a protruding "nose" or b) a recessed conical section or c) nice shaped keel with a conical section. If I can get this down, I think I have a chance at using the V-tool. I will go back and experiment some more, making a shallower angle on the keel and see if that works. Thanks for all your personal attention to the website.
| 02 July 2012 05:15
Dave - Yes, you've got it: go for the keel (cutting) angle first, finishing off on the Arkansas as you say. When you drop the cutting angle you may find the keel broadens towards the heel, making for a conical shape. This will need correcting to prevent the keel binding in the V groove as you cut. There's a lesson in this category on how to do this. You only need to do all this work on your new V tool once, remember, stropping to keep the tool keen from then on, but you'll have a much better tool to carve with.
| 30 June 2012 14:19
Chris, a tool I just purchased seems to have come from the factory with the keel at a cutting angle that is too high, but otherwise sharp and works great. Can I start at this point and grind the keel down to a lower angle and stop right before I get to the edge, then round over on an Arkansas stone, or should I start this whole process from the beginning? Thanks. Dave