Menu
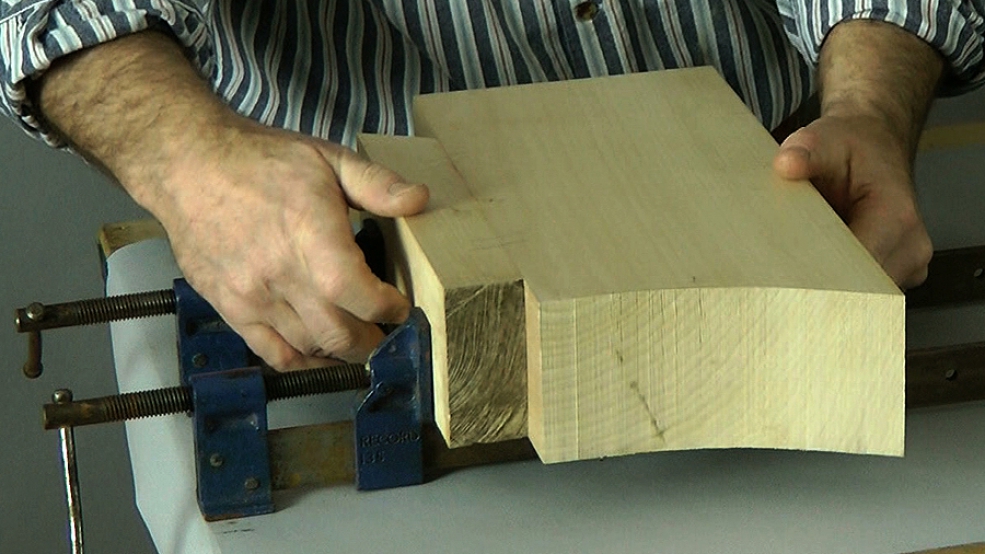
I didn't have a board this wide and thick for our snail at this size so I needed to glue up my starting block from seasoned wood. This is a common problem for carvers and you shouldn't be afraid of gluing boards together - it's always been the common solution. The trick is to make the joins unobtrusive.
In this lesson I take you from my initial thinking to the actual glue up. I'm using ordinary PVA wood glue. Caution: I bleach the shell. My wood is Limewood, which is honey-coloured and bleaches well.
Caution: If you intend using another timber and following the bleaching part of this project, do experiment on a piece of waste wood first! You want to be sure of the efficacy of the wood bleach before committing yourself to all that glueing up and carving.

| 18 July 2016 09:39
Shane - There are 2 things going on here: First, the best (strongest) joints come from face-to-face gluing. As you angle one piece away from the joint you introduce more end-grain and weaken the joint. Full end-grain to side-grain doesn't work - that's why you have joints, in chairs for example. However you can successfully angle the joint somewhat, say up to 30 degrees. But then, as you say, you get changes in grain pattern which are quite noticeable - but that doesn't matter if you are painting or gilding.
So, if you intended to stain your carved whale you might well find it a good option. As in carving the fins separately and inserting them.
However, I do urge you to mock up the tail joints and experiment first before trying it in your full carving

| 17 July 2016 13:26
Hi Chris, seeing that grain direction is so important, when gluing up can you turn the wood to take advantage off grain directing? For example, if carving a whale and you glue up the wood for the flippers in a beneficial grain direction that is different from the body. Or does it not look good in the final outcome?

| 22 July 2013 14:18
Chris, thanks for the long, principled reply. That's what we count on! And I understand. It's, of course, more work and I'll see what I'm able to do. I can't tell you how much I've learned through the videos and your patient teaching. I feel much less alone...
| 22 July 2013 13:42
Ann - Gluing up wood, as here or in other projects is, to me, a perfectly acceptable way of going about things. With good surface-to-surface contact, a modern PVA wood glue and proper clamping, you'll end up with a joint that's stronger than the wood itself. What's really important to my mind is where you place the joints; they want to be discrete in where they are placed, in the colour and grain pattern as best as possible. So, for example, joining two pieces of wood side by side to make a wider board: the worse place to put the join is symmetrically, down the middle; our brains will really notice this. Better to cut one of the pieces in two so you end up with 3 joints, placed at different positions in the board. Far less noticeable. Sorry this is a long reply to what seems to be a simple question but I want to put over a (design) principle.
| 21 July 2013 08:20
Chris - I need to have more surface wood for a relief project. Is it possible to glue two 3cm pieces together along their sides to do this? Will it hold?
| 05 July 2013 19:38
Teasing and rubber bands - yes, have actually done that and will now that this situation is at a glue-or-lose point.
| 05 July 2013 18:16
Ann - I find that if I can tease open that sort of crack, get some wood glue into it, then close it with a little pressure (rubber bands, say) - then, when over carved, the crack is invisible. It's trickier when the wood has detached; you need to line up the broken surfaces exactly, and you do need the pressure to make the glue line thinnest possible. It happens!
| 05 July 2013 09:58
Chris, I'm working much smaller in a different context: when a piece of your sculpture "wants" to break off and you're not willing to give up on it, is there a "best" approach to saving it, as in - do I try to glue in the crack or is there a safe way of separating it and then glueing it back better?
| 20 June 2013 19:55
thanks for including the glue-up. for some reason this step always makes me nervous. like the clamps a *lot* -- have quite a few but not quite like yours, with the holes.