Menu
Principally it's the perspective that makes this is an interesting relief carving: fooling us viewers that we are looking down on the snail as it crawls across the floor, even as the carving hangs vertically on the wall!
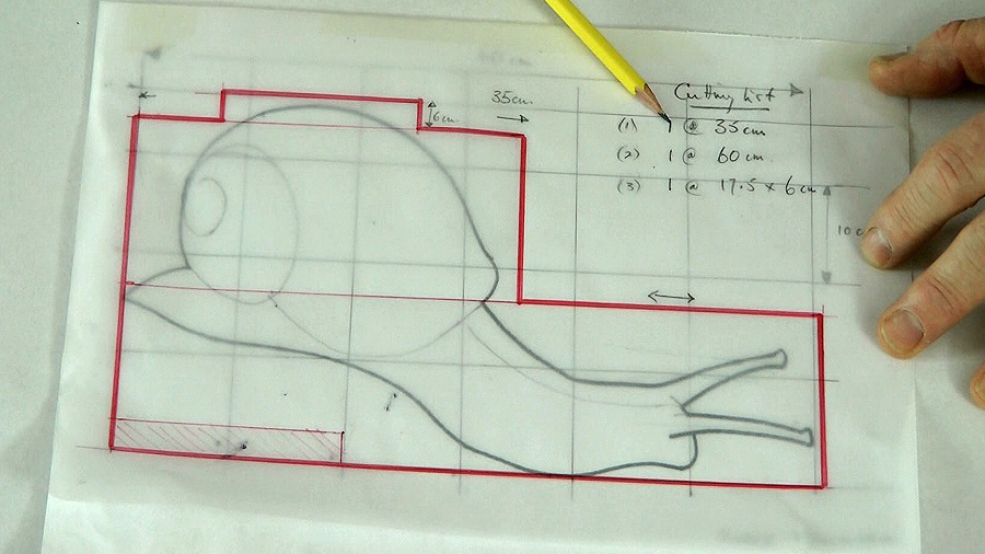
In this lesson we look closely at my design, which must start by knowing what a snail looks like, and how I generated the working drawing and selected my wood. You'll see me point out a second tentacle (coloured red) below the eye stalk, saying I'll be adding it later. But I don't: a creative decision and desire for simplicity as I went along. You can see this project not so much as depicting a real snail as rejoicing in the simple lines and contrasting forms and spaces that you find in these creatures.
For subscribing members, below is my working drawing and tool list for the Snail, as a PDF.

| 17 June 2014 19:13
Ann - I think the best thing to do is take a photograph from the point of view you have in mind. Not least this will give you an accurate outline (from that POV). Draw the outline onto your board and start to add clay. The trick is to work while looking at the model form the same POV, referencing the picture. Then it's the feel or the thing. If it doesn't look right, it isn't! The nice thing about clay is that you can keep adding and removing until it does look right...

| 17 June 2014 13:56
Chris, having done a scaled version of your snail (see Members' Gallery) and admitting that here, if no where else, I'm going to have to do a clay model, what are some guidelines that you could give on getting a similiar kind of perspective on another subject (mine will be a kitten for a "niece" of mine), especially for those of us who aren't artists or good at drawing!