Menu
There's no doubt: Carving with keen, correctly sharpened tools is a joy. We also know that in the hurly-burley of carving the reality can be that we somewhat resent 'down time' and put off well-needed stropping and let tools get a little dull or even damaged.
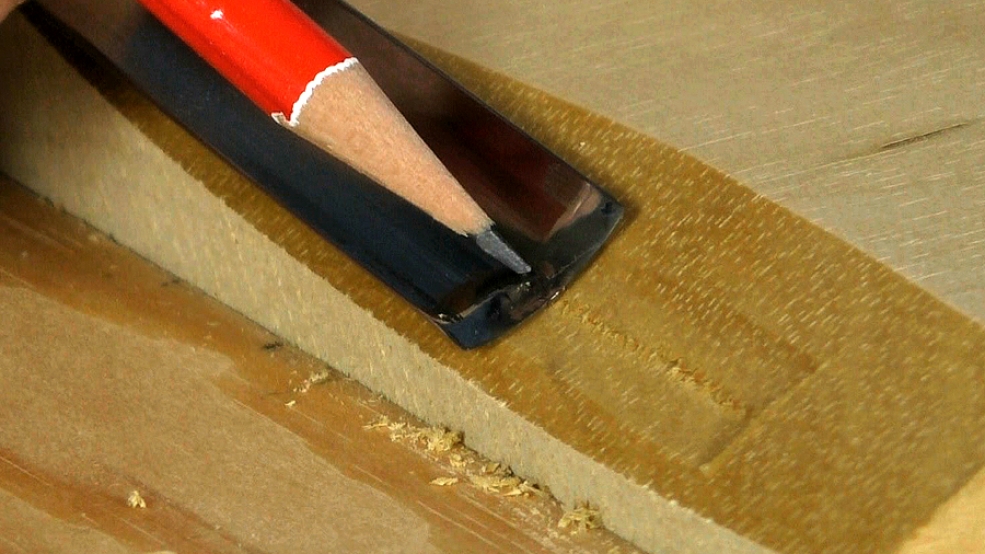
In this lesson, I'll show you the look and feel of a correctly sharpened tool. Then, a little bit exaggerated, the recognisable look of dullness. Remember, 'commissioning' a new tool is a one-off activity. A tool becomes 'dull' because we've neglected regular stropping: ongoing maintenance. At this point we are playing 'catch up' and the blade just needs a light but general touching up.
I'll also show you a very common problem: an edge damaged by dinging it against another tool. For this we can use a special slipstone technique we haven't seen before on Woodcarving Workshops: the 'spot touch up'.

| 04 December 2020 16:49
Imran - Exactly what you say, 'back to a fine stone for a minute or so'. Even less; the bevel might only need a couple of strokes on the finest bench and slipstones to touch up that edge. As a carver, it's all about husbanding your tools as you go along; keeping them sharp and being sensitive to when they need a little TLC and before they need a more aggressive seeing to.
The chances are you won't see the white line of the edge, or even the candle effect; the damage is slight - but you know it's there, enough to give you that dull surface. What we are saying is that stropping at this point won't be enough (unless you are using a power strop), you've left it too late and need the attention of your fine stone.

| 04 December 2020 14:25
Hi Chris. Re: the 2nd example that you show, where the tool does not get the burnished surface, you say going back to a fine stone for a minute or so should sharpen the tool again. What would this process entail? Would this require something similar to the process that you have shown in a separate video on this site, where you demonstrate setting the bevel and talk about the "candle light" being extinguished? or is this one a more simpler process?Thank you