Menu
You've just watched 1 Relief Basics
More videos from
Relief carving basics? Start here.
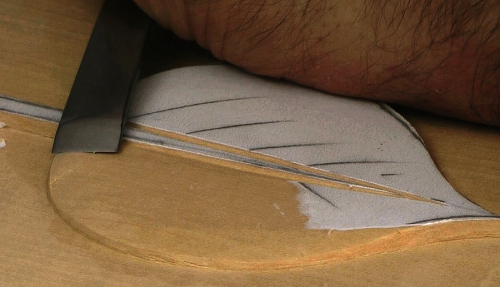
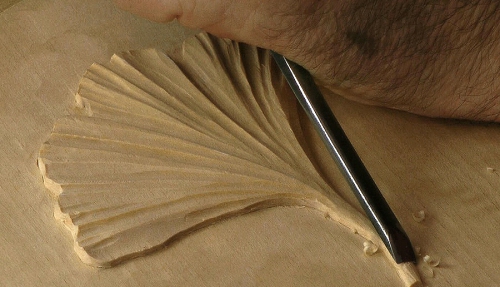
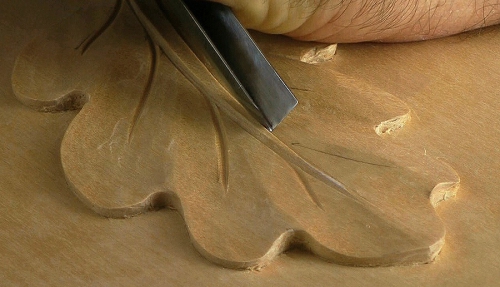
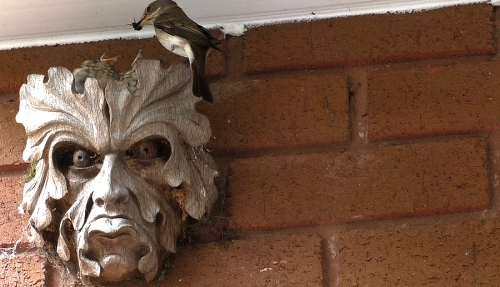
In this short series we'll carve 3 leaves, each one a little more challenging. We'll learn how to approach single-subject relief carvings and some fundamental skills.
This lesson focusses on setting up: the wood, designs, holding etc. Each leaf won't take too long and carving more and other leaves would be excellent practice. How about tiling a wall in leaf panels?
Of course, relief carvings can be a lot more complicated - you'll find other examples on this site and in my books (Relief Carving in Wood and Woodcarving - A Practical Course in particular).
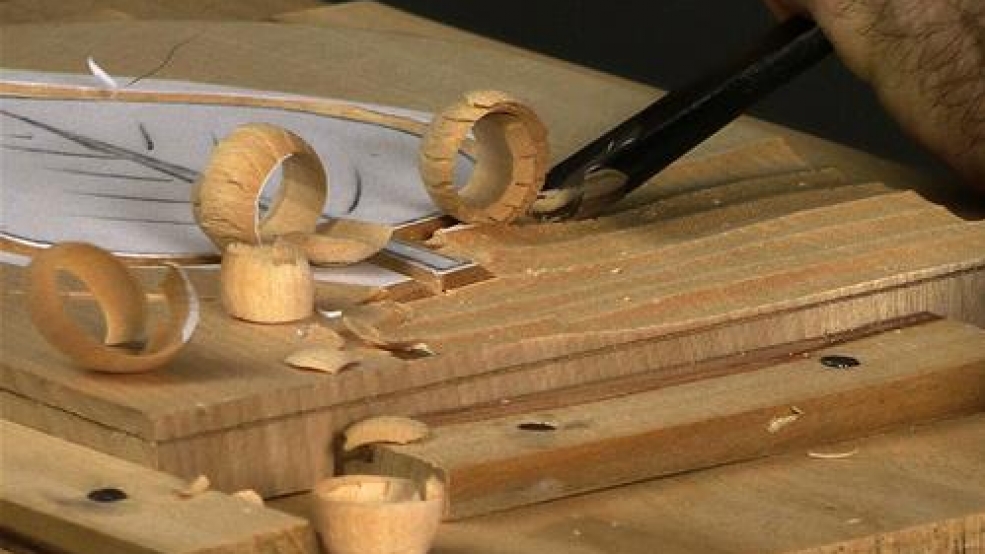
Wood: Choose a wood that's easy to carve; don't make life difficult. I'm using Limewood (Tilia spp.) but Basswood, Brazilian Mahogany or mild Oak for example will do; anything that is tight-grained and fairly easy to push your carving tool through: pines, birches etc. Maple, Beech or Cherry woods are all too hard.
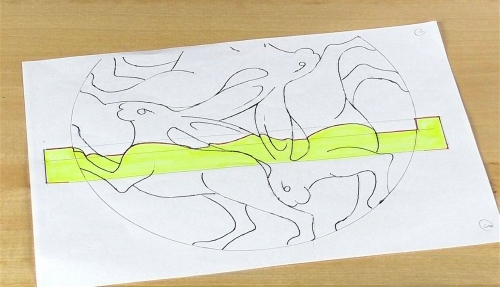
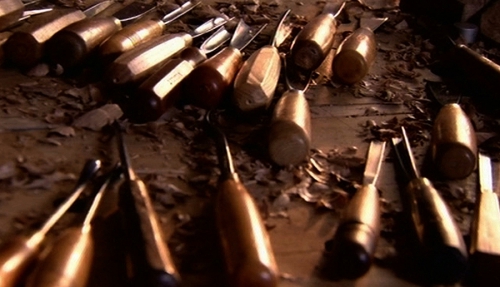
For subscribing members, below is my working drawing and tool list (as a PDF) of the 3 Simple Leaves carvings.

| 15 June 2023 18:08
Richard - Thanks for the question!
How the wood fibres lie, their direction and density of fibres; the presence of knots etc varies in all trees depending on the conditions in which its grown. Oak is particularly variable. When I say mild, I mean not too hard (dense), no knots, straight grain. That would be the easiest and most desirable wood to carve. I think you can imagine the opposite!
When you are beginning your career as a carver, you need all the help you can get, and wood that helps you - is easy to work - rather than wood you have to fight is what you want to be looking for.

| 15 June 2023 07:05
What is mild oak?
| 27 October 2020 17:40
Adam - The hairs-on-the-arm thing is nonsense as far as woodcarvers are concerned; a tool may be able to shave an arm but not last seconds when put into hard timber. Yes, edges need to be keen but most of what dictates how a tool penetrates wood is in the 'wedge' of metal, the profile of the bevels (outer and inner) that support that edge.
When I sharpen a gouge I focus on getting the 'wedge' right and find the cutting edge takes care of itself. That's the way to think of it.
When it comes to the chisel 'stroke', there are 3 parts: the tool enters, moves along and exits. I would guess you can't make the move because are attacking the wood at too high an angle, because your bevels are too short. Take one tool, lengthen the bevel on the outside, make sure the edge is keen and see what happens...
| 26 October 2020 19:48
Chris. I'm so jealous of how easily your chisels dip into nd out of the wood. My strokes always get stuck and I'm always having to rescue them by yanking them out. I can never actually fully conclude whether my gouges are sharp enough, so I'm unsure if this is the problem or if it's bad technique. Some guy on YT reckoned that the blade needs to be sharp enough to cut hairs on your arm. Would you agree with that?
| 30 June 2015 10:03
Dermot - Sometimes I use simple cartidge paper from my sketch pad but often a blank sheet from my printer seems to do the job just as well. I use thicker water-colour paper for the paper-sandwich way of holding carvings, which you see elsewhere on the site.
| 26 June 2015 19:50
Chris, what paper do you find works best for drawing the pattern on. I just wondered if different papershad advantages or disadvantages ?
| 26 January 2015 13:21
Daniel - I prefer to stand when carving: I feel I can use my body more fluidly, easily stand back and look at what's going on and put my weight more behind the chisel. So I recommend this where possible. However, if you need to sit, then sit! Whatever works best. I know a carver who sits using a 'nightwatchman's stool', which has a single central leg so the nightwatchman can't drop off to sleep! He made it from an old bicycle seat.
| 24 January 2015 14:53
Simple questionb... Seated? or Standing?
| 08 July 2013 07:21
David - I've stopped (or at least tried to stop!) calling it 'pen & dagger' because the so many weird and wonderful ways out there in which people hold their pens weren't helping. If you look in Techniques > Grip Series > #5 - 7 High Angle Grip, you'll find me explaining the grip in detail. It IS a little tricky to get the hang of and you will need to develop the muscles in you hand and arm but it's quite a natural way of working, and very adaptable - this is no 'one way' of setting it up. Keep an eye out elsewhere in the projects and you'll see that I'm using it a lot of the time, and in different variations.
| 08 July 2013 02:47
Chris- Having a bit of trouble with the "pen and knife" grip that you used to cut the edge of the leaf. The shot in the video is kind of tight and I can't quite see how your hands are positioned. Would it be possible to add a short instructional segment in the grips section? Thanks, Dave.

| 07 December 2012 16:52
Great suggestion Chris..thanks! And I already have the perfect place for notes - my sketchbook of carving designs. I hope you and yours have a very Happy Christmas Season.
| 07 December 2012 15:49
Roman - Other than 'bookmarking' (or adding to 'favourites') the page, at the moment I'm afraid there isn't. But here's an idea: what about keeping a journal/diary of what you've watched? In other words, if you watch the lessons with a notebook and write down salient points, ideas etc, even (aargh!) words of wisdom you'll have a useful aide mÃ?moire as well as a note of what you watched. When I first learned from Gino Masero 35 years ago, each evening and sometimes during the day I wrote up everything I could remember. Years later, it was still an influential and valuable reference. I could even hear his voice.
| 05 December 2012 17:17
Chris - along the lines of Sharon's question, is there a way to mark or otherwise tell which videos I've watched? As I've gotten further in, I've been skipping around a bit since I'm primarily interested in relief carving but will eventually go back and watch all of them. However, with so many to watch I'm not always sure if I've already seen one until I start it (especially when there are multiple parts to a particular lesson). Thanks!
| 25 May 2012 10:12
Hi Chris, after looking at this video of a simple project, I realised that even if I already learned all my basic cuts and techniques from a good teacher, from relief carving to in the round, we end up forgetting a few important details and we even adopting some bad habits with time. After doing mainly in the round carving in the last 2 years, I find it good to go back to simple projects like this to get out of the routine, get rid of the back habits, and work again on the fundamental skills we need to acquire better habits.
Thanks for the videos, I have a ton of books that I use for ideas, but for me, nothing beats a video to remind me how I should do it.. correctly.
| 16 May 2012 17:12
Sorry Chris, not noticed that... oops.
| 16 May 2012 15:46
Sharon - If you look at the 'Recent Videos' page under the About tab, you'll see the last 3 months of video lesson uploads. I update this page each month.
| 16 May 2012 06:43
Hi Chris
Can I make a small suggestion? Is there a way to mark what the new videos are? I can see the count has gone up but I'm not familiar enough with the site to know what the new ones are.
Thanks