Menu
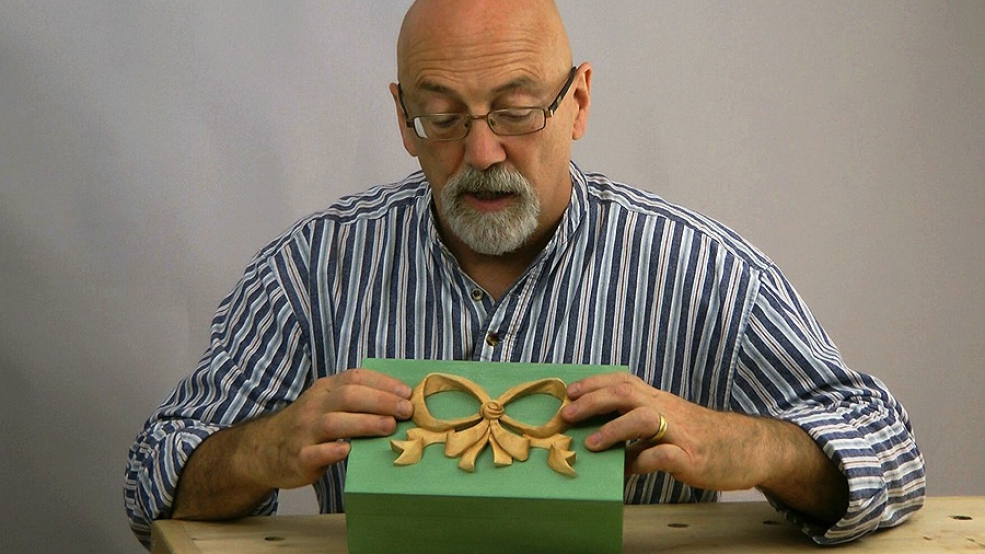
An appliqué bow and ribbon - a posh way of saying it's 'stuck on' - with many applications: mirror frames or fireplaces for example. Or, as here, a simple motif to decorate a box. Once you get a sense of how they work, you can cluster bows together or design your own.
Wood: Pick some close-grained wood such as Lime, Basswood or Brazilian Mahogany, about 1in. 25mm thick; grain going across the design.
For subscribing members, below is my working drawing and tool list for the Bow & Ribbon, as a pdf.

| 12 July 2014 20:54
Harold - Thanks for writing that, I love your attitude. Even if you don't want to carve acanthus leaves, it's a great exercise and you'll learn skills which apply in many other projects. That's really how I think of the whole of this website: transferrable skills. Well done - best of luck with the left side. Let's see your Ribbon & Bow in the gallery!

| 08 July 2014 16:16
What a great learning project! I chose do carve this specifically because of the changing grain and three-dimensional changes. I can carve fairly well; but have an absolutely terrible time 'seeing' (thinking) how a pattern changes into a 3D carving. I'm about half through now and this piece is perfect for even a beginner; yes, you will make some mistake (I did), but they can be fixed and you will learn a lot from this piece. For my unrequested advice - do this project! I've already learned a lot on the right-hand side and am holding off on the left hand side to compare and see what I've learned. Thanks Chris and Carrie!

| 02 September 2013 02:01
Hi Chris,I'm looking at carving the Ribbon & Bow,and later the Acanthus Leaves. My wood is about
20mm or 3/4 inch thick. Is this OK for these carvings. I cannot see these figures in your drawings.
Thanks for these lessons they are fantasic. Dave
| 08 April 2013 19:08
Thomas - Yes, that's odd isn't it. The Pfeil #11 is an open U shaped gouge which is a little long in the sides but I think will do the trick; so give that a go? Alternatively, Henry Taylor make a nicely shaped #10. Best of luck with your carving. Remember, if it doesn't work out the first time, do it again - it's all good practice!
| 08 April 2013 17:08
I'm getting ready to tackle this project and when I tried to get some #10 gouges as suggested on your tool list I realized that Pfeil doesn't make a #10. Is this because they use the Swiss numbering system? Should I simply subtract 1 from the gouge sizes you mention, I realize the numbering changes drastically for V-tools and chisels? So in this case where you speak about using a #10 in the Sheffield system I would use a #9 in the Swiss numbering system?
I'm guessing the real answer is that it doesn't matter so much - just look at what needs to be done and find a gouge that matches the need.
Thanks for the great lessons, I've always wanted to learn to carve and these videos are just what I needed.