Menu

| 09 August 2023 22:11
Brian - The cutting edge itself is a product of the bevel angles - yes?
If by 'flat' you mean too acute a cutting angle - the outer bevel will appear quite long - then yes, I'd think that is what is going on.
The best thing to do here is keep that acute outer bevel and focus on creating more inner bevel, which will act as a buttress and give the edge strength. When you add the inner bevel you will perforce create quite a substantial wire edge on the outside, just take this off with your fine stone.

| 03 August 2023 17:07
Chris, my cutting edge appears weak, it looks almost wavy, do I have it too flat? I got a sharp edge and cut well briefly then disappeared with a crumbly looking cutting edge. My gut tells me I made the bevel too flat.
Your thoughts sir?
| 23 September 2022 06:49
William - If you put "strop" into the search box, top left, you'll find the little series of videos I did on making strop paste. Exactly what you need!
I don't know the Tormek paste but if it stays on the strop then certainly give it a go.
On my strops, the tallow/suet mix abrasive forms a distinct, though thin, layer. Perhaps once a year I need to freshen the strop surface with a little new mix; otherwise it's probably still mostly the paste I put on the leather when I first started...
That the paste sticks to the leather is quite important, and leather is such a good surface for sticking unto. Only a smear comes off on the blade when I strop, which I wipe off before returning to carving.

| 21 September 2022 01:14
Chris. On second thought, would Tormek paste abrasive work when applied directly on the strop? I also have some tallow if that would be necessary in combination with paste.
| 21 September 2022 00:16
I have a nice new hard leather strop. Can you tell me what specific brand of strop paste/cake product that you use? It would simplify my day to just order one product that I know works for you. Thanks for this great video.
| 29 April 2019 07:47
Charles - I think the issue is how the tool feels in your hands rather than a numerical length. We all have different sized and shaped hands for example and a lot is what you get used to and how you grip and work with individual tools. Bigger tools have more robust handles, fine tools much lighter ones. If you lined up all my tools you'd find a spread of lengths around 'thereabouts'. There really isn't a standard length or classification, though you might think this when you buy new tools the handles of which seem to have been cloned.
So, I suggest you get carving and just see what suits you, and feel free to change the handle. I've changed/made the handles on a lot of my tools over the years and each change was about comfort and feel rather than length.
Hope this helps!
| 28 April 2019 23:30
Hello Chris,
I have been searching for lengths for gouges. I have a 3/12 gouge that measures 250 mm in length. Would that be classified as standard or large ? I have visited several sights in an attempt to quantify lengths. If I was to order on line how can I ascertain that I am ordering the correct item ?
Thank you
Charles
| 28 April 2019 08:29
Charles - You can re-shape slipstones by rubbing them on something harder, even using a grinding wheel or belt sander. Having said that, you MUST use a waterwheel or have competent dust extraction/dust protection - lots of aggressive particles to breathe in!
Mostly though, II reshape or redress my slipstones by rubbing back and forth on emery paper with oil as you say you are using, or just on the coarse benchstones. I always finish off on a fine surface. It does take a while but you shouldn't need to do it very often,
| 27 April 2019 22:28
How would someone produce a slip stone of a specific size/contour ? Presently I am working with several different diameter dowel rods and emery cloth dipped in oil. I find it is better than nothing but it is not the desired material/method. Any ideas ?
| 01 December 2017 08:55
Pamela - If you look to the directory on the left you'll see 'Stropping by Hand' where you see me making the strop paste.
My experience of lard is that it's too soft and isn't refined enough and tends to grow mould on a strop that isn't being used; suet is a better option, tallow, which you can find online is best .
Proportions? Those solid blocks of abrasive are means to let at the high friction temperature of a spinning buffing wheel and, on their own, tend to flake off the leather. Adding the suet/ tallow makes them more pliable and so sticky to the leather. Really, then, you want 'just enough'. I'd try adding half the amount agin as the suet/tallow. There should be plenty of abrasive on the leather surface to do the job.
| 01 December 2017 00:47
You mention making your own stropping paste by melting fat and part of a stropping bar 600 grit I believe. Two questions:
1. For the fat, can you use lard?
2. What are the proportions? 1:1?
Thanks
Pam
| 05 September 2017 00:41
Peter - Well done! If there is one quality carvers need have, it's persistence. You certainly have that!
You'll find the next tool much comes quicker. And with well shaped and sharpened carving tools, and your natural persistence, the carving world is open to you. Wishing you all the best.
| 04 September 2017 02:40
I’ve been carving on and off (mostly off) for nearly 15 years and have never been much good at sharpening. But, after watching your videos, I did finally commission my first tool. It took 5 tries over 5 days and I shortened the tool by a quarter inch, but the tool is a dream to use. It’s amazing I didn’t do this sooner. Thanks, Chris, for passing on such wonderful and helpful information.

| 03 April 2016 17:56
Thank you Chris, with all my heart!
| 03 April 2016 14:36
François - Thank you for writing about your experience. Music to my ears! It's heart-warming to hear how your work is changing for the better as a result of what you find on Woodcarving Workshops. Joy and success to your carving!
| 03 April 2016 09:39
Hello Chris, I sharpened three small gouges, and that worked well! when I took a Pfeil #2/20 that was really harder, the outside bevel was convex rather than flat so I re-seen the entire DVD's videos... then that worked really well, it unlocked the "thing", so to speak! I didn't pressed enough on the end of the gouge with my fingers. Thank you so much for these videos, they really help! It's a real pleasure to learn like this, with both of you. Since I carve, about 18 years, all my gouges have one bevel, and a lot no more corners, sometimes it was really frustrating, I really didn't know how and what to do. I bought the Koch's Grinding and sharpening tools HT 2000, I always used it like they say, the gouges are really sharpened but they loose their cutting really fast and the background of my reliefs wasn't smooth and clean like I wanted; whith your lessons I understood that the keel was too pronounced with a concave bevel, that's the thing! My way of carving is changing, it is a real upheaval, I see no more in the same way now. Thank you so much Chris.
Le Buisson de Cadouin, France.
| 17 November 2015 13:39
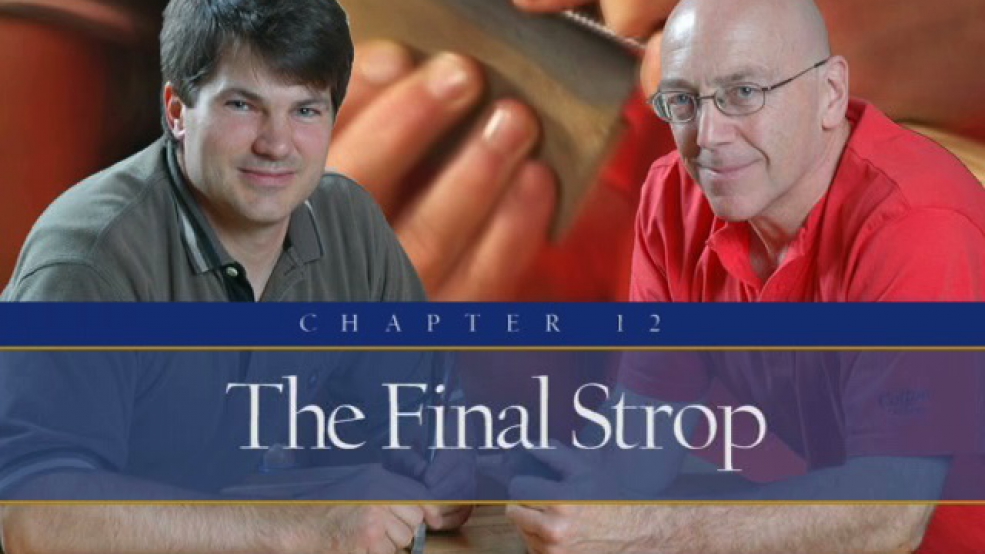
Don - Although you might think there's a 'Pye Method', there really isn't. I was taught to profile and sharpen my carving tools this way by a fantastic master carver, who learned it from his teacher, and so on. If it was what HE did, then that's what I was going to do - and did, 40 years ago. I've not for a moment regretted learning the skill as a woodcarver and never improved on it! So it has a great lineage, and I'm simply passing it on. If you want to know what I do, then THIS is what I do - it's up to you to test for yourself. Don't just 'tune up'; make sure you understand what I'm doing and properly commission your tools. On to sticks of abrasive compound: my experience is that the colour is arbitrary and product-led. The sticks are designed to melt on high speed buffing wheels, becoming brittle and hard when cold. Thus they tend to flake off the bench strops. However, if you melt them with a little tallow or suet, they'll soften and work well on the strop.
| 16 November 2015 18:12
am new to your teaching and find that all the chisels i have sharpened and carved with need the pye-tuneup - ah well. the zen of it all will come to me soon, i am sure... have heard that one of the sticks of compound used on cloth buffing wheels is good for dressing a strop - the white one maybe? any thots on that, or on any other compound i could use right out of the box, so to speak. thanks for the time. don e., tacoma. wa.
| 19 August 2014 13:30
Chris, Thanks very much for replying and clarfying that for me.
| 19 August 2014 12:35
SUE - You asked a question and I'm afraid I deleted it by mistake. I do apologise for that - and I DO have my answer, if you can recall what you asked! I don't know why Norton, or anyone, might call the combination my 'signature' benchstone. The slipstones that Norton sell ARE because they were my design, but the combination fine/coarse benchstone is what Norton have always made - it's a stone I started out with so the stone is THAT old at least! I do recommend it, as I do their Translucent Arkansas benchstone, whatever it's called, and there is no combination with Carborundum and Arkansas that I know of. Mostly you will use the coarse side of the benchstone and pass to the Arkansas, but it's nice to have that in-between grit for a little more refinement.
| 16 March 2014 14:32
Marie - 1) Downloads > Key Notes on Sharpening Gouges. 2) Study the 8 Factors 3) Check you have a low cutting angle, which usually means a significantly longer outside bevel than the gouge had when you bought it (there's a lesson on this too). 4) Check that the ouside bevel is flat as possible. 5) Check you have an inside bevel, one that you can distinctly feel. 5) Check the cutting edge: straight across at right angles, with the corners. 6) Check the cutting edge for sharpness - no white line or dots. Try the tool out on the sort of wood you want to carve. 7) Strop well, inside and out, keeping to that low curtting angle. Assuming a keen cutting edge, the sweetness of cutting is always dependant on the angles of the bevels. Just work with one tool until you have the tool cutting just right. You'll know it when you find it and nothing else will ever do again.
| 15 March 2014 02:25
I've finished my first to attempts with the techniques outlined in this video series. I now have two gouges which look the part, but which really don't cut as "sweetly" as I had hoped. Would you be able to walk through the though process you would go through in this situation to diagnosis what is wrong with the tool? Since I can't see any problems...does that indicate that the problem might have been with the stropping?
| 10 March 2014 09:38
Claire - It's just that thin stuff you find making handbags, purses etc, which you can find for next to nothing in charity/thrift shops. There's more about making strops in the sharpening section of the site.
| 09 March 2014 07:40
Hi Chris, for a newbie, where can you get the leather you talk about for adding the paste to? Thanks Claire

| 03 December 2013 07:59
Wonderful series Chris. Now I am armed to commission my Two Cherries gouges, v tools n knife I bought a few years ago. I bought them when I first started carving not knowing they didn't have an edge. Then I'll tackle the rest of the tools. Your videos are awesome and ditto what Vincent Lyles said. You are adding greatly to my carving skills, way of working and enjoyment - thank you, Jeanne Noel Chalfont
| 13 November 2013 07:37
Charles - I use a 'Norton Coarse benchstone' (though what they call a 'combination' stone will do) for the faster, shaping work. I finish to a sharp edge with a 'Transclucent Arkansas' benchstone. Both are 8 x 2". The Translucent part is important: an opaquer, whiter Arkanses stone will be too coarse, even though they are sold as 'Fine'; a 'Black Arkansas' is too fine.For the inside bevel/wire edge I use the slipstones I designed with Norton (Chris Pye Signature Slipstiones'). You find more info in my book, 'Woodcarving Tools, Maaterials & Equipment', vol. 1.
| 13 November 2013 01:26
Hello Chris,
When I purchase the stones used in your video on sharpening what specifically do I ask for ? I realize they are oil stones but there are oil stones and then there are oil stones. Please advise.
Thank you,
Charles
| 19 July 2013 13:56
Bert - Well done! Just keep going and you'll soon be through that lower end of the learning curve, though we never stop learning of course....
| 17 June 2013 14:41
Hi Chris. Thank you so much for these. I've been a professional woodworker for 50 years, 42 as a self employed furniture designer maker. To date my carving has been limited, mainly linen folds and things like that. Now I have four very complex pieces to do so I thought it a good time to see a real pro at work.
Having just joined your classes I thought this the best place to start. As you say sharpening is THE most important skill to learn. Well I have to tell you I've learned. But your teaching is a pleasure. As an apprentice the only time I knew I was doing things correctly was when the master's mallet didn't fly across the shop at my head. Followed by some extremely choice language. I am so looking forward to following these videos.
Pete Bennett Le Bois-Servant (The Wood Servant)
| 13 April 2013 12:20
Chris & Rob, this was a great instructional video. I was hoping that sharpening new carving tools was a bit less that prepping new hand plane blades - well, in the end I guess it's good to be intimate with all your cutting edges. I like the folded leather strop! I was trying to roll leather around different dowels and tapers, which was painful. BTW: you can still find "Tallow" at most boat building supply stores as that it is needed to treat you oar leathers. Here is a link to a supplier: "www.clcboats.com/shop/products/boat-gear/oars/oarsman-marine-tallow.html".

| 14 March 2013 15:46
Chris, thank you so much! I completed all the videos in the sharpening category, and got to work on my set of mid-grade Japanese gouges( the only tools of this quality I will ever buy). They came out of the box with a 35-37 degree outside bevel, no inside bevel, and a slight radius rather than a straight cutting edge. After nicking the corner of the tool on the grinding wheel and slightly bluing a little bit of the front edge, I got the edge straight, the outer bevel to 21-23 degrees, and the inner bevel at about 8 degrees. Using the bench stones and slip stones was actually easier than I thought it would be! Now I have extremely sharp, strop polished gouges that cut like my Pheil tools. Thank you again for the instruction, I can't wait to see what else I can learn from your awesome lessons.
| 02 October 2012 02:39
Alan - in the USA: 'Tools for Working Wood'; in the UK: 'Classic Hand Tools'.
| 01 October 2012 04:52
Thank you both very much. I have your sharpening books. I would love to actually know everything in them some day, but there is an overwhelming amount of information in there. This DVD has helped me grasp the essentials. I now know I am way over-sharpening my tools.
| 29 September 2012 19:25
Where can I buy the Norton Slipstone?
| 01 September 2012 13:25
Thank you very much!

| 23 June 2012 15:44
I just went through the entire Rob Cosman, Chris Pye sharpening series of videos. Talk about complete and comprehensive. This series of videos answered all of the questions I had about the differences between sharpening bench chisles, which I am accustom to doing, and carving gouges and carving tools.
The lessons I learned in this series alone were worth the price of the course.
My thanks goes out to both Chris and Rob for putting this series together.
Jesse Chavez
| 25 May 2012 06:17
Vincent - You are not alone here: beginners to carving all too easy become fearful of leaving the factory-sharpened-comfort-zone when it comes to their tools. They fear ruining them in some way with bungled sharpening attempts. But they - you - must get beyond that, and asap! It's really worth a little investment of time and money not only to convince yourself of what I'm saying but to learn the skill of sharpening your gouge correctly. It'll pay back hugely in the long run. I suggest you buy another gouge - say a #6 x 1/2" - just to practise sharpening on. Dedicate the weekend to trying different things: different cutting angles, with or without an inner bevel - how much inner bevel? What cutting angle? - and so on. Try my approach and how I profile the gouge. Try what you read other carvers do, and make your own mind up. You can reduce the length to about an inch above the shoulder and still have tempered steel, by which time you will have gained a huge amount of experience. You must understand that sharpening is a skill that, like all skills, is learnable with understanding and practice. Go for it! And all the best with your new path.
| 24 May 2012 20:28
Mr Cosman ends with "this has been Great" - and so it is! I think that I have now watched all the video clips on this site from "tools" to "wood & finishing" and it has it has been so enjoyable but, more to the point, educational and empowering! Chris's soft voice somehow has authority, without being dictatorial, and is encouraging without being patronising - a rare gift.
I started less than a year ago craving spoons from solid parts of the old plum tree we felled before it fell over. No background at all in fashioning materials [a desk job then re-trained to be a physiotherapist], I just did what seemed right with tools from the car boot sales. Bought the Pfeil 12 piece gouge set, got a range of different woods from a local supplier and attempted a celtic knot in Oak and a more detailed spoon in Sycamore - and possible projects are bubbling away.
I've loved all the clips all so far, feel all fired up to do more but, for some unknown reason, I'm still taking a deep breath and not embarking on changing the cutting angle on my factory honed tools just yet.