Menu
This is really important!
One step at a time. Step by step. Step 1 - do this. Get your gouge looking like this.
When, and only when you have done that, do step 2 - and so on
Work with one gouge until you have sharpening it correctly. Don't move on to another tool until you have.
Then back to step by step for the next tool. It's a skill, not a mystery.

| 29 February 2024 09:50
Ajit - Carving tools differ from bench tools in that they have a bevel on both sides. Gouges longer 'outside'; shorter 'inside.
Lettering chisels have an equal bevel on both sides (15-20) and are truly symmetrical.
Most bench chisels are offset so I strongly suggest you buy proper woodcarving chisels - assuming you want to letter - rather than make do with the bench ones.

| 25 February 2024 16:05
Hi Chris: My bench chisels are shaped 30-0: I have a 30-degree secondary bevel on one side, and no bevel on the other side. Should carving chisels be shaped the same way, or would a 20-10 double bevel be better?
| 22 February 2024 22:38
Hi Chris: Lots of good information here. But terms like "coarse" and "fine" seem to vary from one stone manufacturer to the next. Could you provide some objective guidance, e.g. which grits to use for coarse shaping and fine sharpening?
| 29 January 2024 09:12
Rob - Thanks very much for posting those thoughts!
Bottom line is getting the tools commissioned - shaped and sharpened - in the way you want them (or in this case the way I suggest on this website), and there are many ways to do this. Without the right slipstones, we have to 'MacGyver' it and simply find some way that works, as you have here.
| 29 January 2024 05:18
Hello Chris! Loved your YouTube videos and then was convinced by Adam Thorpe to signup for your site.
I've found that 300x, 1200x, and 4000x diamond stones work great for shaping, sharpening, and final sharpening. And that bullnosed wooden blocks covered with 180x and 1500x sandpaper work in place of slipstones. A single thick leather strip charged with honing compound can be formed to hone inside bevels on 2s through 7s, and a thinner strip works for 8's and up.
| 21 January 2024 09:21
Kevin - I'm afraid the special slipstones went out of production a while ago and I doubt you'll find any now. They were a great innovation but Norton, a huge firm who generously made them, went through a shake-down and carving proved too small a part of their inventory.
So we are back to the 'old days' when it comes to slipstones, making do with what we can find. And that is exactly how I and many another carver had to work for many years. It's quite possible to adapt slipstones to fit insides of gouges, though it does mean grabbing whatever slipstones you can find and not being afraid to modify them.
Online searches are the way to go.
Bear in mind too that you can remove a large amount of inner bevel metal with power burs or wheels before finishing off with the (slower) slipstones.
If you put 'slipstones' into the search box on the site you'll find some other ideas and suggestions. The trick is to really understand what you need to do and then find/modify something that will do it.
| 20 January 2024 04:07
I wish I knew where you got your slip stones because mine don’t fit the shape of my inside bevels on my regular size gouges.
| 18 December 2022 09:47
William - Yes, the scattering of particles will be part of the natural make up of the stone and, ideally, you want the stone smooth and clear - rather like the way we want our carving wood. The gritty effect is more annoying than affecting the sharpening power, as you have found.
Have you tried the other side?
You can treat the sanding belts as if you were flattening wood, and depending how much you need to flatten: starting say 80 and finishing 180. But do experiment. I keep these 'stone belts' to one side for this particular operation.

| 18 December 2022 01:41
Chris. My Norton premium Arkansas stone leaves particle bits as I sharpen. Close examination shows very slight pock marks in the stone's surface. The tool "bumps" along over the shedding bits in an unwelcome manner. The tools seem to be no worse for this. Is this a defect in my natural stone?
You mentioned flattening an Arkansas stone on a belt sander. Can you recommend the grit I should use?
| 24 February 2021 14:24
Will do thanks chris
| 24 February 2021 09:20
Thomas - Do find yourself some good, seasoned (air-dried) carving wood to start with if you can. I know sourcing wood can be (yet another) hurdle when you are starting but it would be like trying to learn to play on a poor musical instrument - it doesn't help! Nor the look of the final piece.
These days, searching online is the way to go: timber yards, furniture makers, woodturners, other carvers, carving clubs etc. Buy more than you need; you'll use it down the road.
| 23 February 2021 19:06
If I’m honest it’s very satisfying when you do finally have a commissioned sharp gouge
I’ll get it no problem bit of practice
I’ve got a lot of green logs now after asking around I’ll use some of it green and store some for seasoning so I’ve got some wood to mess about with and nice large pieces for later
I really wanted to start with some relief carving still struggling for suitable pieces
I really like the dog portrait you did and wanna try similar carvings to that
| 23 February 2021 18:21
Thomas - I'm sure I also muttered something like that under my breath when I first learned. But I don't regret the experience and it didn't take me too long to get myself set up and sharpening quicker.
Remember, you only have to commission a tool once; after that it's maintenance. Also you don't need many tools to get carving - the Beginners Course uses just three I think.
Good for you keeping at it. See it as a Right of Passage rather than the Spanish Inquisition?
| 23 February 2021 17:56
What unholy form of torture is this????
After may hours at the stones I have two usable gouges and a ruined v tool
I’ve tried to get by without the ideal tools for the job a bench grinder is on the cards
What you were saying about persistence is ringing true now trouble finding suitable
Gouges suitable wood and sharpening equipment been weeks now and still setting up
Almost there now I’ll keep at it just want to get carving now
| 28 December 2020 10:25
Stephen - Yes, Azucena has a good point: water-cooled grinders or belt sanders totally eliminate the hazards of dust.
It used to be Tormek had the market but if you search for 'water-cooled grinder' now you'll find quite a few cheaper models. And you don't need an expensive one, as long as it runs true, since you'll only be using it now and then.
| 27 December 2020 19:23
Thanks azucena, i`ll look into that.
| 27 December 2020 18:32
Stephen - I used a wet belt sander with a diamond belt at my work and it worked great in shaping some coarse stones I had without the hazardous dust. It would be a pricey investment, but it does work well.
| 27 December 2020 10:19
Classic Hand Tools was one of the first places i looked a while back, like everywhere else they only sell medium and fine norton slipstones chris. Cheers anyway.
| 26 December 2020 10:49
Stephen - Sorry. I read your question too quickly and missed the crucial bit.
You can certainly modify slipstones and benchstones to suit - we have a video on this very thing -and, indeed, this is what carvers have always had to do. The tear-drop slipstones you see around were originally made for gunsmiths...
Anyway, put 'norton carborundum slipstones' (or 'slip stones') into Google but go for the images option and you'll see all sorts of coarse slipstones (eg. https://www.classichandtools.com/acatalog/Norton-44mm-by-106mm-Teardop-Slipstone-NSS34.html#SID=2790) including some you could modify, which in most case means flattening the radius for the flatter gouges.
The other think to think about is using your grinder for the bigger gouges. Keep one wheel flat for the outer bevel and round over the other for the inner.
DUST! However you modify your stones or wheels, do protect your lungs from the dust, which is made of very sharp crystals...
| 23 December 2020 17:32
Thanks chris, i`ve already bought the norton combination stone , it was the coarse slipstones that i can`t find anywhere, uk. rs-online included. They sell a coarse triangular stone but as i mentioned, the only slipstones seem to be medium and fine unfortunately. I`ve looked everywhere online but not a lot of joy .
I`ll definitely be looking at your carving tutorials but not sure how i`m going to put that inside bevel on without a coarse slipstone... might have to end up hunting down a coarse bench stone and seeing if i can customize it!?
| 22 December 2020 23:28
Stephen - Try putting, "Norton India coarse/fine carborundum stone" into Google and you'll see quite a few sources here in the UK. (https://uk.rs-online.com/ for example).
Glad to hear you are getting on with the sharpening - do stay on for the carving!
| 22 December 2020 09:44
Hi chris, first i just wanted to say what a great resource and help your videos are. I`m mainly here for the sharpening and have just bought a translucent arkansas stone, a translucent slipstone and a norton combination stone to commission my gouges. The only thing i can`t seem to source anywhere in the UK is a coarse grit slipstone, norton or otherwise. The only ones that seem to be available are medium and fine, any suggestions? Best regards, stephen.
| 26 August 2020 16:58
Imran - You can certainly do that. The only thing you need to watch for is keeping the oil away from the diamond stones, which use water to wash away the dross.
Whatever works!

| 25 August 2020 01:33
Hi Chris. Would there be any instance where combining 2 types of stones would be considered appropriate? For eg. using fine/extrafine diamond (grits ~ 600 and 1200 respectively), and finishing with translucent arkansas (grit ~4000). Thank you
| 24 August 2020 15:24
Sean - Honestly, I'm not sure what's best but your thoughts seem about right. Since this paper is relatively inexpensive there's room for experimenting?
BTW, I've seen this sort of paper as self-adhesive, and glass is a good alternative to granite.

| 23 August 2020 16:32
Hi Chris. I do not have wet stones or oil stone at the moment so my plan is to sharpen using wet and dry paper fixed to a flat granite slab. Which grades would you suggest. My thoughts were perhaps 120 for the heavy work and then a 600 and 1200 to finish.
| 08 July 2020 07:57
Andrew - Yes. Unless the edge gets damaged in some way (to the extent that you leave a 'snail track' in the wood for example, in which case you'll see a dot of white when you look at the edge) then regular stropping is all you need to do.
RESHARPENING: Stropping uses a very fine abrasive. It's like 'topping up' the edge as you work. If the edge gets damaged, as above, then you need something stronger: your Translucent Arkansas. Also if you let the edge go dull because you haven't been stropping, you may need to resort to the stone.
Do look at the video here: Sharpening > Maintaining Tools 1, especially towards the end. There's an issue with regular stropping and rounding the bevel that you need to be aware of!
STROP PASTE: There's a video on making strop paste with suggestions for what to add here: Sharpening > Stropping by Hand.
I don't know what's out there for bench strops, I'm afraid. All of what seems to be sold is the hard cakes for power stropping. I've always made my own; it's quite easy to do, and make enough for a lifetime...
| 07 July 2020 14:12
Chris - Great video. Just to be clear; once commissioned do you rely purely on stropping or do you re-sharpen with your Arkansas:if so how often? Also best stropping compound?
| 21 June 2020 13:25
Ivana - I get that sort of question quite a lot! A similar one is, how long should a beginner take to do this or that carving. And - sorry - there really isn’t an answer I can/will give you. There’s a huge range between our physical abilities, aptitudes, dedication etc, not to mention different types of tools or sharpening equipment, and I don’t think comparisons help. Actually, I don’t think they really matter!
Commissioning a gouge will take you as long as it takes you. The first time will take the longest as you work out what you are doing. And, because it’s a skill that you can learn, you’ll get better and quicker each time so that in the end it’s not something you really think about, you just do what needs to be done so that you carve and not think about your tools.
On that first time, which takes the longest (and I think the length of time probably drove your question), 3 things:
1 Remember that you need only spend all this time commission the tool ONCE. After that it’s maintenance with your strop.
2 90% - more - of the work can be done on the faster, coarse stones or grinder. The fine stones are for finishing. (Rather like carving: 90% of the work is done in 10% of the time.) So work as far as you can/dare with those.
3 Feel you really understand what you are aiming for; why I suggest you sharpen the tool to a particular profile, and the steps to get there. The means to get there are not so important if they do the job.
This skill is such an investment in you future joy and success in woodcarving.
When I first went to see the man who became my mentor, we spent the weekend learning the sharpening, and only the last hour doing any carving! I’ve always prized that foundation, making the tools my own.
| 20 June 2020 18:19
Many thanks Chris! At the end, I managed to get my hands on RH Preyda's Arkansas, soft (400-600 equivalent grit) and translucent one (8000-10000). May I please ask, according to your experience how long does it take for a beginner to sharpen the tool with no power machines? It is just to understand if I am doing something wrong, since I started sharpening yesterday =] Thanks!
| 04 June 2020 12:15
Ivana - I never use waterstones myself, mainly because by their very nature they wear so quickly and there's a lack slipstones. However...
I think a coarse/fine combination carborundum oilstone would be a good investment,though you would need to match that with oil-based slipstones for the inside of the gouge. However, the fine side of the carborundum is not really good enough for a finish cut (ie. leaving your carving straight off the cutting edge). Assuming you want to use waterstones, you could get very close to a finished edge with the carborundum stone and use your waterstone for the last slicking up.
A 4000 grit would seem to me to be plenty fine enough for finishing, after that your talking a strop.
| 04 June 2020 10:38
Hello! I am wondering what would be a recommended grit for a course and a fine stone (for a beginner)? Another question is, could waterstones 1000 and 3000 (for kitchen knifes) do the job or it is just better to invest into 1000 and 8000-10000 oilstones? Many thanks!
| 23 December 2019 17:39
Noriko - I have checked the video and all is working as it is, picture and sound, so I think the issue must be your end.
Please try emptying the cache on your computer and reloading the page; that usually fixes most issues.
If the problem continues, write to us through the contact page and we'll do our best to help further.
| 20 December 2019 12:02
I didn't get picture from more video after I watch no fear sharpning .I can hear only your voices .
| 23 October 2019 08:24
Nicolas - It's bound to take a while when you are beginning: working out what you are going for and getting a feel for the method. I'm sure I spent a couple of hours commissioning my first gouge. But l got faster and faster as I tucked the whole process under my belt. So now I would say that 15-20 mins tops is what it takes me - obviously the bigger the gouge, the longer - and I am much more accurate with the grinding wheels and coarse stones, with 90% of the work is done right there.
But do remember we are talking 'commissioning' here: getting the tool 'fit for service', which is a one-off thing you need to do. After that it's regular maintenance, stropping.
| 22 October 2019 22:09
How long should it take to condition a new gouge by hand on a bench stone? Is it typical to take one or two hours to condition a gouge with a high cutting angle from the manufacturer? Even using a course stone, the material is slow to sharpen.
| 23 October 2018 10:00
Bobby - I do! Take it easy: persistence is the key, and enjoying the journey...
| 21 October 2018 09:34
Bobby - There is little difference in technique between a #6 gouge and #3; it's more to do with the rotation of the blade on the benchstone. .
If the edge seems to be crumbling, the chances are you have two low a cutting angle, making for a long 'wedge' and thus a delicate cutting edge. The solution is to increase the inside bevel or raise that cutting angle. Me, I'd add more inside bevel.
| 05 May 2018 06:39
Kevin - The length of the bevel you end up with depends on the thickness of the blade. So, presenting at the same angle to the stone, you'll have a shorter bevel with thinner metal and vice versa. Sometimes the blade thickness is uneven and you'll find, as you offer the bevel to the stone uniformly, that one side of the bevel ends up longer than the other, or even the heel is wavy. Just ignore all that, sharpen at your cutting angle and the bevel length will take care of itself.
As an aside, generally speaking, better carving tools have thin blades...
| 05 May 2018 02:27
Chris -- my question is a slight variation on one that has been asked before. I am commissioning the first of several Henry Taylor carving gouges. I've made a couple jigs that allow me to control the angle of the inside and outside bevels quite accurately (even though I know that high precision is not required). The blades of some of these tools are relatively thin when compared to those of some other manufacturers. When I take up some of that thickness with a 7 degree inside bevel about 3 mm long, the outside bevel (at 15 degrees) ends up being relatively short (around 6 mm or so), when compared to some of the commissioned tools you show in your videos. Having said that, the tool has a good, low cutting angle and seems to work well. My question is, do you feel that a relatively short outside bevel is a problem? I could lengthen it by reducing the inside angle, the outside angle, or both, but I have no sense for whether this would be beneficial.
Thanks for your advice, and thank you for providing this site -- I have learned a great deal from your videos!
| 29 April 2018 08:13
John - I do understand the stress that can come when you start learning to sharpen but do remember it's just a piece of metal, and tempered at least 3/4 of the way down to the shoulder and you can't really destroy it. And if you do end up shortening the blade a bit as you keep working at it, it's a small material cost of learning this skill - and you've still got the tool.
The white line: your aim is to keep it as even as possible as you proceed. All you are doing is removing metal. If the white line is thicker on one side than the other, work on just the thick bit until you get it back to the thinner; then try and work evenly.
Inside for outside bevel? Most beginners don't add much inside bevel so, with a new tool, this is what you need to concentrate on, and we shape this - grind it in - at a very early stage.
It's true that when you add inside bells etc, you alter the radius of the sweep but it's really very small and quite insignificant when it comes to carving with the tool, so don't think about that and sharpen from whichever side (outer or inner bevel) seems easiest. When you are carving you'll not think about the sweep number; you'll just pick up the tool the looks right for the job.
Just keep at it! I suggest you just work on one tool until you are really happy with what you have achieved - and you'll know it when you get there - before moving on.
Experience will render all subsequent tools much easier and in the end it'll not be something you think much about and you'll be stuck into your carving. More to worry about!
| 27 April 2018 21:45
Hi Chris,
I'm commissioning my first gouge. I've watched a lot of your videos prior to attempting this but as you can imagine, and probably recall, it's a bit of a stressful thing... I don't want to destroy it. My question does not seem to be addressed in any of the videos but it may have been addressed in the comments - or I just may have overlooked the answer.
If I have a thicker white line on one side of the gouge versus the other, how do I know which side to remove material from? Isn't there a possibility of changing the radius of the gouge if I remove the material from the wrong surface (inside bevel vs. outside bevel)? My outside bevel is pretty "square/perpendicular" to the edges of the gouge but I know that can be deceiving based upon one of your videos discussing the "hand-crafted anomalies" that go into making these gouges. Thanks in advance for the help!
| 16 April 2018 08:41
Karen - Some outside bevel angle is put on by the blacksmiths who make them but I don't know exactly what it is. Whatever, you need to check and adjust it yourself as you properly commission your carving tools (to include an inner bevel).
| 13 April 2018 15:30
Chris, I see that you collaborate with Auriou. Has that changed the bevel angle of their tools when they leave the factory so that they are now 15-20 degrees? If not, what bevel angle do they have, best estimate? I did not previously appreciate the importance of the bevel angle. Thanks. Karen
| 03 April 2018 07:44
Lee - I've not had too much success with them myself, finding them either too coarse of too fine. They also wear out and cannot be flattened/restored, and there seem to be only a few conical slipstones to be had. So I've always and happily stuck to what I know reliably works,
However, I'm sure there are carvers out there who use diamond stones successfully and if any of you are reading this, please add your own comments and experience!
| 02 April 2018 14:24
Hi Chris,
What are your thoughts on diamond stones?
| 26 February 2018 09:28
Brian - You can also find them here: https://www.sharpeningsupplies.com. Norton will be discontinuing production of these slipstones after the last orders are taken so get them while you can!
| 23 February 2018 13:54
Chris - my error - I now see them at Classic Hand Tools (https://www.classichandtools.com/acatalog/Chris-Pye-Sharpening-Signature-Series.html), and at Tools for Working Wood (https://www.toolsforworkingwood.com/store/item/NO-CHRISPYE.XX/Norton_Chris_Pye_Signature_Oilstones_and_Slips). However, I don't see them in the Rob Cosman store.
| 23 February 2018 13:48
Chris, as of today, I'm not seeing the Chris Pye Norton slipstones available at Rob Cosman, Tools for Working Wood, or Classic Hand Tools. Have these slipstones been discontinued? If not, can you post a link to them, and if so, can you post a link to a reasonable alternative?
| 19 February 2018 22:14
Both 1 & 2 is the best explanation I have had the pleasure to embrace. . Thank You Chris
| 17 February 2018 11:14
Bill - You need as thin a leather as possible so as not to bulk up the profile of wood that you have shaped. Thrift/charity shops are a good source of bags etc that have this sort of leather.
I think it very noble of you, wanting to sacrifice your sportscar to your woodcarving!
Rough up any finished surface of the leather and glue to this side to the wood - so the 'rough' side is out. Add you strop paste to the working surface of the slipstrop only, leaving the bottom part clean.
| 17 February 2018 00:37
How do you make the wooden strops for the inside bevels? Is a soft thin leather (i.e. from a sports car seat) acceptable?
| 28 January 2018 09:46
Kenny - I'll try!
I'm giving you the full monty here; some tools may need more, or less, work to commission them. Taking back and squaring the edge like this lets me see the white line very clearly and makes it easy to create a strong and accurate inside bevel. It's not so easy to shape in a neat inside bevel with a factory sharpened edge, and most beginners end up only adding a little or unsquaring the edge.
| 28 January 2018 09:14
Hi Chris thanks for all the inspiration. Keep it up!
Now I was curious why it's necessary to take down the edge so aggressively in step one. What would happen if you skipped that step?
| 20 January 2018 21:14
Patricia - Sorry, but no. The videos are only available to stream, but they are available 24/7 and you can view them as many times as you like.
| 20 January 2018 19:40
Can I download these to my computer to look at later.
| 06 January 2018 08:34
Gordon - At the end of the day, stropping is still about removing metal! It's the same with the Black Hard Arkansas stone - it's so hard and fine that, although it's beautiful looking, it's so fine that it hardly removes metal and thus is useless for sharpening carving tools. We need just the right amount of aggression for what we want to do.
| 06 January 2018 01:09
Thanks. I have been using a paste much finer than 600 grit, and wondering why it does not seem to do a good job. I'll try something more aggressive!
| 02 January 2018 12:37
Gordon - Honestly, I mix all sorts of abrasives together into my strop past and don't have a particular recommendation - see the video on making it. I know 600 grit 'valve grinding paste' is a good baseline if you can get something like that. I also melt in the sort of block that's used for a high-speed polisher, which all seem much of a muchness and seem to do the job.
| 02 January 2018 08:51
Great videos, thanks, Chris! When stropping what grade (in microns) of polishing or grinding paste would you recommend?

| 22 December 2017 15:07
Chris -- thanks for the tips! I do think I need to invest in better slipstones. I have a water stone which has two curves but neither are great for flatter tools. Also, neither really polish the bevel like the Arkansas bench stones do. I'm going to check into the stone sets that you mention in the slipstone video. Cheers.
| 21 December 2017 07:15
David - I think you've made your own diagnosis! It must be something you are doing to over sharpen the corners, and it can only be over-rotation. The #3 sweep is tricky like that, you almost have to just 'think' the rotation rather than make too much of a conscious effort.
Try blacking the bevel with a Sharpie before applying it to the stone, to see where the contact is.
You do want to keep the corners on a fishtail but don't want to keep squaring the edge back to recover them as the tool quickly becomes narrower.
I'd use a a flattish slipstone to work a strong inside bevel, avoiding the corners and pulling back the metal in the middle. You should be able to recover the corners.
| 20 December 2017 20:46
Hi Chris -- hope this finds you well. Do you have any tips for shaping and sharpening fishtail gouges? I am having trouble keeping the corners of the cutting edge from rounding. Am I over-rotating? The tool I've been working has a #3 sweep, so I image the rocking has to be very subtle. I welcome your thoughts.
| 02 September 2017 11:05
Dan - No problem. If by 'shape a gouge by hand' you mean shape without a power grinder then that's quite straight forward: replace the grinder with the coarse bench and slipstones:
Square off (coarse b/s) and polish the edge (fine b/s) to get the thick white line of the edge. Then set/shape the inner and outer bevels at the correct angles with the coarse stones to a fine white line. Finish off to a sharp edge and no white line with the fine stones.
(BTW) That white line is a key indicator: use it to keep an eye on those corners.)
When I was first taught sharpening, I didn't use a grinder for quite a while. I had to do everything by hand (as above) so I do know it takes a long time. I was very glad when I got that grinder!
| 02 September 2017 09:45
Thanks for the answer Chris and I apologize for being maybe a little abrupt in my previous message. I would still like to have a little more instruction on how to shape a gouge by hand - take it as a suggestion for a future video.
| 02 September 2017 03:04
Dan - These days, quite a few tools come 'factory sharpened', which is in response to the growth of carving as a hobby, and that's the best you'll get. Only carvers can sharpen their tools exactly as they themselves want, and this involves an initial commissioning - shaping in the way they prefer. Not all carvers like their tools shaped the same way - they carve in different ways, different from me. For example, some will have no inside bevel; others will use 'nosed' tools without corners; some have very long bevels for soft woods; some very short for very dense woods.
As for Auriou, I didn't 'design' the tools; they follow the Sheffield list. I oversaw the selection, quality, thickness of steel, tempering, allongee shape etc. They are not MY tools, but tools for all carvers, who differ as I say above and, bottom line again, I believe strongly that carvers need to be able to shape and sharpen their tools, with the same fundamental importance to the craft as a violinist being able to tune their violin.
Sharpening a bench chisel is much simpler than sharpening a carving tool; it's a much simpler tool doing a much simpler job. I've done my best on this site to describe how I sharpen my tools and show you how to get there, both with the videos and extensive downloads and don't think I can be clearer. You really just need to have a go at it.
I understand your frustration at not finding carving tools ready commissioned as I commission them. You can use tools straight out of the box. However, if you want to carve as I do and have your tools like mine, then you have to bite that bullet and commission them. But do remember: you only need to commission tools once, after that its maintenance by stropping.
I hope I've been helpful. Rather than repeat ourselves and fill this comments section, if you want to pursue this discussion further I think it best you write to me directly (see contact page).
| 01 September 2017 22:52
I'm ok with sharpening. I have a problem with shaping the tool myself, I don't understand why can't they be shaped by the factory? If you designed tools for auriou why are the tools not shaped? What is your design exactly for those tools?
I tried to shape a cheap gouge by hand on diamonds last night. By the time I had the long bevel you recommend the corners were gone... I'll probably improve if I do it 2000 times more but you really need to provide some more clear and simple advice for this, preferably without needing power tools. Have a look at how Paul sellers teaches sharpening of bench chisels. I could use something like that for carving gouges.
| 01 September 2017 22:37
Dan - I think I'm going to have to speak straight here:
When I began carving over 40 years ago, you couldn't buy a ready-sharpened carving tool: all new carving tools just had an outside bevel that was roughly 'set' on a factory grinding wheel but otherwise was completely blunt; carvers were expected to do the rest. Different carvers sharpen in different ways. I'm showing you the way that I was taught and love, but carvers have always had their personal preferences, so the sharpening was left to them. And so it remains today. So, no: there is a no carving tool you can buy that doesn't need commissioning to make it work as efficiently as possible, and that includes Auriou.
Bottom line: Carvers sharpen their own carving tools. That's what carvers did. That's what carvers have always done. I do it; it was the very first thing that I learned. It wasn't and isn't a big deal unless you make it so.
Here's another bottom line: the fact is that, compared with carving itself, sharpening is quite straightforward. In some ways you can see sharpening as a rite of passage. My experience is that if you find sharpening your carving tools a pain, you're going to find carving frustrating too.
The main thing you need besides you're carving tools is the means to sharpen them. Otherwise carving is a relatively cheap woodworking occupation. And, yes, you need to sharpen your carving tools, but you should see it as an investment and the more you do it the quicker you'll get.
Woodcarving is a deeply involving craft, the essence of which pivots around that cutting-edge. Somehow you need to find enjoyment and satisfaction in learning to sharpen your carving tools, as part of the journey into woodcarving.
| 31 August 2017 22:18
The thought that no manufacturer sells a tool that already has all the proper bevels and angles is depressing. I know from sharpening bench chisels how much work is required to remove metal and to create these bevels and I have no intention to buy an electric grinder really... so, is there really no brand of wood carving chisels that has all the bevels as you prescribe in this video? Not even those designed by you for Auriou?
| 28 July 2017 15:08
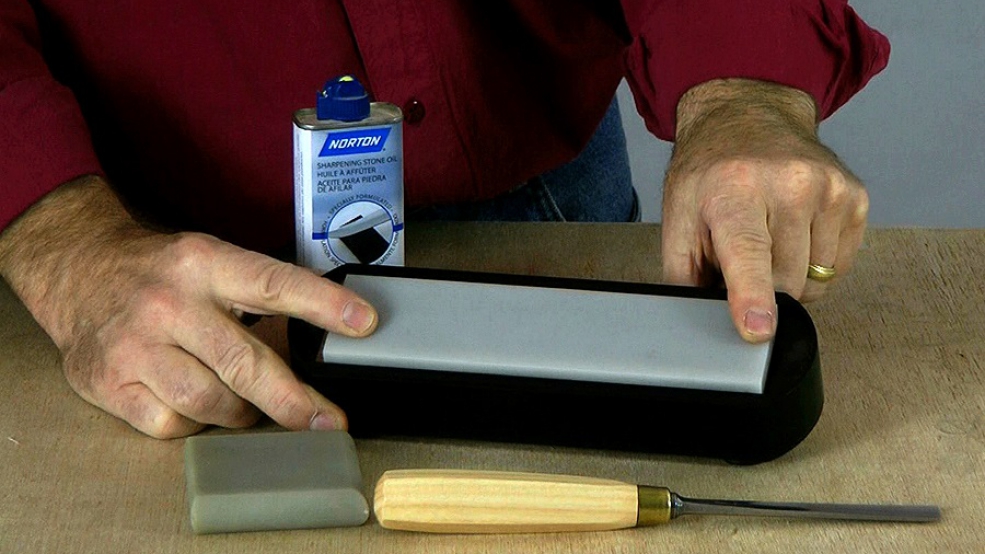
Iria - I know these stones seem expensive but, when you do buy them, you must see them as an investment. The best coarse stones are arguably the onse made by Norton Even better is their coarse/fine mix. Search online for 'Norton India Combination Benchstone'.
If you keep the oil and water separate, you should be able to mix waterstones and oilstones. Give it a go!
| 27 July 2017 23:12
Hello Chris! I am new to the website and already learned a lot. I have to buy the sharpening stones now, but I can not afford very expensive ones. I am having difficulties finding an oil "coarse" stone. Which grit range would you call "coarse"?, and also, could it be a problem to use a coarse water stone, and a fine Arcansas (with oil) afterwards?. If I clean the tool so no water goes into the oil stone, I think it will be OK, but I would like to know your opinion.
Thank you for this answer and all the amazing videos!

| 09 June 2017 18:45
Well, I'll learn from your experience, then. Google and the vendor site really don't go into the difference between the black Arkansas and the Translucent Arkansas stones. You make that very clear. It can get me started, at any rate.
Actually, to get started, I've dressed the wheel of (grandfather) Zada Polaski's hand cranked bench grindstone, and rooted through his old journeyman's box to find a very nice Carborundum stone, made by the Carborundum Company, Niagara Falls, NY. It was right next to the squirt can of Singer Sewing MAchine oil, (US $0.30 cents). The box is nearly intact, the stone flat on both (different) surfaces. I gave my Grandmother's (now motorized) Singer sewing machine to a fellow retiree who wants to craft specialty table napkins. I'll keep the oil; it's half full and still quite good.
It boggles my mind about that hard Black Arkansas stone. For whittling, I have a replica of a Viking Whetstone on a cord around my neck. Super hard and smooth. I hone my small whittling blades on it. It's a reproduction of whetstone pendants found in Viking Age York, made of Jasper. It smooths the edges of the hardest steel knife I've got. Wish I could shape it. www.ragweedforge.com Catalog|Sharpening|Stones
I admit to having some 8"x3" DMT diamond stones. Oh, and lots of leather, stropping paste and planed Maple on hand. I'll give it a try on a lesser tool and see if I can show you the results. I'll be trying it on a 1095 steel tool.
| 09 June 2017 16:38
Jeff - Sorry I can't be more help but I have very little experience of diamond grit/stones and you'll need to test them yourself.
I do know, however, that the black Arkansas is incredibly fine, too fine for me: it's like trying to sharpen a tool on the equivalent of a strop.
Try putting 'translucent Arkansas benchstone' into Google...
| 07 June 2017 21:10
Chris you were silent to my question about using very fine grade DMT (8000 mesh) diamond bench stones for the pre-stropping work. It occurred to me that diamonds, however fine they are, do leave scratches which confound the mirror appearance we would be after. There's a dearth of translucent stones on the usual markets, but I have found:
"...Genuine Arkansas Black Novaculite Whetstone mined ONLY from the Ouachita Mountain region of Central Arkansas. This is the finest knife sharpening material in the World. This rare bench stone can put a surgical quality edge on any blade. It is available in two lengths and comes in...(a box)" They are black, certainly not translucent, but would they do the finishing job after the course/medium stone does the shaping? And, then stropping, of course?
Or would a 8"x3" 8000 mesh diamond stones suffice? As we'd say in Arkansas: "Jes' sayin'. Seeings I have one." ;-)
There are no substitutes for the recommended slipstones "..s'far as I kin see."

| 26 April 2017 14:12
Perhaps I may be of help here as I have used Lee Valley's wood sharpening slips. It is not that they don't work but that they don't work well. The strop paste does not adhere easily due to a sprayed lacquer on the surface of the wood. I found that the wood slips were actually dangerous to use in that the design is not well thought out. The slips need to be inserted in a wood base so you have to have a router or know someone who is proficient at using one. The problem is that the base of the wood slip is not deep enough and to hold it in your hand without a long leather glove is extremely dangerous to one's heath. I found making the wood slips out of scrap wood and covering them with leather to be the best option. It gives you the satisfaction of making it and it works well. Chris's years of experience always seems to prove right, darn it anyway! The thinner the leather the better, as it molds to the shape of the wood and allows a base for the paste to stick. Hope this helps.
| 23 April 2017 17:46
Jeff - It's the abrasive (strop paste) that does the work. I use leather for my strops, with thin leather over wood for shaped slipstrops; the leather gives good adhesion of the paste. I've never used plain wood I'm afraid, so you'll have to experiment. Don't take too long - you have all that carving to get on with!
| 23 April 2017 12:05
So, Chris, those beautiful, and might I say expensive, diamond bench stones are now relegated to bench chisels, straight and skew wood plane irons, and my 17 inch SMLE (Lee Enfield) Wilkinson sword bayonet from back in the day. I had a feeling when I saw the mirror gleam of your outer/long bevel, that oil stones were called for. So be it.
I only have the bayonet, no doubt a forebear of Richard Sharpe's sword bayonet. The .303 Enfield itself has no doubt been "sporterized" and is happily hunting venison in the hills and trails of Pennsylvania. I will not miss that metal butt plate one single bit.
What do you think of clean, smooth hardwood substrate (flat or shaped) for a nice consistency of preliminary stropping before bringing out the horsehide?
| 23 April 2017 10:21
Jeff - Buy an 8 x 2" Norton India Combination Benchstone for your coarse benchstone - it also has a fine side, just in case. Translucent Arkansas benchstone you know about, to finish. Use 3-in-1 (light bicycle) oil.
Job done.
| 22 April 2017 21:52
The last comment I made was on April Fool's Day. I left out an important point or two:
(1) The slipstones I admired earlier turn out to be Chris' design. My last alternative was going to be a graduated set of dowels covered with microgrit film (graduated of course), adhered with Pressure Sensitive Adhesive (PSA). I use that a lot on carving knives and it works, but can be expensive to refresh the grit surface. I'd be an (April's) Fool not to use Chris' designed stones with only two grits and maybe some improvisation where needed.
(2) The bench stones are a bit confusing. Not the translucent Arkansas-- I use a pocket size one on detail carving knives. But the coarser stone for shaping is variously described as "Coarse" or "Medium", or whatever the maker wants to call it. If I were to procure an oilstone, what would it be called and from where would I get it?
Well, those are the two things that fooled me.
But, there's a third: I have a graduated set of DMT bench stones that could substitute for oil stones. I only have to choose the right "grit", or as DMT call it, "mesh". My mesh runs from Extra ,Extra Coarse (as for ax heads) all the way to Extra, Extra Fine (3 micron, 8,000 mesh) Then we can get ridiculous with DMT diamond sprays to 0.3 microns for mosquito eye surgery tools.
The DMT stones are big enough, using common glass cleaner takes care of the swarf, and anyway even diamond stones wear down a bit and change their grinding characteristics. I could easily justify very well designed special carving slip stones if I could put DMT bench stones I already own to multiple uses.
Comments are welcome. Even urgently requested, as it is time to commision my first true carving tools.
| 12 April 2017 07:35
Azucena - The detail set is for quite small/narrow tools and my thinking was that, since we are only talking about removing a small amount of metal, perhaps a coarse slipstone would be too aggressive and a user might easily over-sharpen the corners or the edge. So I opted for a finer shaping stone.
You have what's called a 'combination' benchstone, which I recommend by the way, and this gives you a choice of abrasives. For these smaller tools I sometimes use the fine side as you suggest: it's slower but seems to work quickly enough on such small tools. So it's sort of your choice, how you want to play it!
| 12 April 2017 03:48
Hi Chris - I'm commissioning a 3mm #8 gouge. I'm using your detail slip stones to do the inner bevel. I noticed the coarse stone is finer that the other slip stones, so for the outside bevel should I be using the fine (orange) side of the flat carborundum stone?
| 02 April 2017 19:05
Wendy, Karen, Jeffrey - It's great to see you getting to grips with the sharpening, and sharing.
At the risk of reiterating what's been said, let me say this: bottom line, it's the carving. It's the putting of the steel to the wood. The tool is a means to an end; and extension of your hands and mind. I only ever use the Sheffield list when I'm ordering tools and I never think of a number when I pick one up. It must be true that I alter the sweep when I add an inner bevel but it really makes no odds. Any one tool can be made to cut in many different ways and I seem to pick up the one that does the job, not really thinking much about what nomenclature it has.
The method that I teach for sharpening - the low cutting angle and the inner bevel - is something I learned from my mentor, and I've never improved on it. I'm sure it took many years before I was really comfortable with it, really convinced it gave me very versatile and efficient tools, and knowing the feel of what it should be like. I teach this stuff, breaking it down into bullet points, but I have to leave it to you to really put the time and effort in.
What is satisfying to me is sensing that you are 'getting it'. Well done! Crucial as it is, the skill of sharpening is less than the skill of carving itself and you can get the bones of it under your belt quite quickly. Do the best you can then, as you put your time in carving, you'll flesh out your understanding with the application.
Joy and success to your carving!

| 02 April 2017 16:47
Karen, your comment below is one of the most helpful comments I have read. I have followed many of the conversations and have followed the same journey of commissioning tools. Chris's technique has really helped me feel as though I know exactly where I am going and given me a way to critique my work. That being said, my tools are sharper than ever, but I can see on the videos, not as sharp as Chris's. So I continue to develop that "feel" and bit by bit I am getting better and better at this. Exciting, important. I think I am as proud of my ever-improving skills as a sharpener, as I am of the carving.
| 01 April 2017 18:37
Karen, I guess if I cut through my verbosity, in short I was saying that the more I watch and read Chris Pye, the more frantically I race to read and watch more. I don't want to miss anything, as I clearly missed in my comment of 30 March. Not only were the slip stones different on each edge, as I "discovered", but I later learned that Chris designed them that way! Good thing I've held off on buying slip stones.
The Sheffield Chart was also a delayed discovery. The minute I start "commissioning" a gouge, I change its relationship to the chart -- and its relationship to all the other gouges. The lesson for me was that it is all right to be approximate as long as the tool, when finished, does what I want it to do.
So much for slip stones; so much for Sheffield Charts; and, so much for what I had learned and learned very well about woodworking and carpentry chisels (from an online master carpenter). When I sharpen a bench chisel, one inch width stays one inch wide and the bevel remains the same. They really are quite different from carving tools and while that was one of the first things Chris said in his introduction to tools, it took me a while to really believe it.
| 01 April 2017 16:47
I just want to say that I have never bothered being that technical. I watched Chris's commissioning video and practiced, it takes time, a lot of time. I highly recommend his slip stones. I doubt I am even close to the sharpness that Chris reaches on his tools but that being said my tools have never been sharper and now that I am sort of spoiled I will never go back to the old way no matter how long it takes me to sharpen. Once I reached where I felt I was there at that point of what I felt was almost a breath of perfection I had to mess with it some more. I have spent hours and hours at it and I still struggle but I am much better. Using the double bevel method I noticed I stropped more, well, it seemed so anyway. Perhaps it is because now that I have seen the results I won't except anything less and quality. I can sense now when I need to strop. I can feel that tiny smidgen of bead on the edge of the metal no matter how small, and weirdly, the tool may seem sharp. When I went that bit extra it made all the difference. There has been struggle and at times aggravation trying this method but it has been worth it. I smile when I think of what I have achieved, yet I am well aware that it may take me 20 more years to perfect!
| 31 March 2017 12:43
I watched both of these sharpening/commissioning videos again. I printed out the Sheffield chart, checked to see that one inch was one inch and it was. I then took the sculpture house tools on hand and tried to match them up. They were what I would call "approximate". A 1/16th here and a sweep deviation there. I went back to your first two videos on "commissioning" a tool and saw what might account for differences.
Pardon my hogging this comment section, but I prefer to work with sharpened tools from the get-go. And from the get-go, two things appear to happen to the sweep: (1) the outer bevel is lengthened per your explanation. Very careful work might not affect the sweep, but your first tasks include grinding the edge to be at right angles to the length of the tool. That, in and of itself, may affect the sweep. (2) Create a completely new bevel at the inside of the edge. That also really may well affect the sweep.
Assuming the actual factory edge precisely matches the Sheffield Chart, these three changes may cause the edge to mismatch the chart. For me, they did, and the edge didn't quite match the chart in the first place. Some are so close that they don't seem to matter, unless the operator at the other end of the tool is a perfectionist. Doubling the length of the outer bevel and creating a new bevel would seem to me to change the sweep and perhaps even the width of the tools edge. Taking the edge of a fishtail down 1/8th of an inch certainly affects the edge width.
So, what to make of that? I am working with American brand tools made for 140 years. You are demonstrating perhaps on Swiss tools. I'd tend to look to the Swiss tools for accuracy, especially since the American Company is going out of business. But the Swiss tools have now had their edges squared, outer bevels changed significantly, and new inner bevels made. By the time all this is done, the chart may best be described as a very useful approximation.
So, what's a carver to do? Answer: approximate. Get the job done, and if the lowering channels are a bit wider, narrower, or steeper, what is the difference, because that part of the work is not really yet done. If the sweep is wider and more shallow than the chart, so extra cuts are needed. You did say early in the game that we can design the carving according to the tools at hand.
Your described method of creating a bit as you go on with the work seems consistent with this.
One more factor, and it's important. The tools that don't precisely match the Sheffield Chart are a fraction of the cost of the Auriou, Pfeil, etc, high end tools. Still good steel, holds the edge, and strops well. My conclusion is to go ahead with commissioning the tools to their best potential and work with what I've got. The chart very well might be the inaccurate issue, but it's my cutting that counts in the end, isn't it?
Your comments would be most appreciated. I'll be following your work flow, but my expectations seem to be changing, perhaps much forthe better.
| 30 March 2017 15:41
Chris, I see the slipstone you are using is square, with edges that apparently have different convex profiles to accommodate the inside bevels of different sweeps. Am I correct? And is this slipstone a very fine stone? If so, I have yet to find such a thing on this side of the Pond, and would have to make due with different types, shapes and sizes. The typical in-cannell stone has a graduated surface that leaves only a quite short portion that matches the sweep, unless I get creative with narrower sections.
Is it feasible to use assorted wood substrates with fine emery paper, as in the collection of leather strops you have? Or shape a stone myself? Or, even use different diameter wood dowels with much coarser stropping compounds, since I seem to remember that compounds do come in different grades? (Ignoring for the moment that reshaping by stropping is a LOT of work; I'd tend to resort to wet-dry abrasive paper, since it's hopefully a one-time thing.)
| 17 January 2017 10:24
Karen - If you thoroughly wipe all the oil off the stone well before you put it away, it shouldn't glaze over, which might be what's happening. When you do use the stone, be generous with the oil; it has a job to do: lifting the abraded debris out of the pores. Too little allows the pores fill up and show less 'tooth'. Sometimes, you'll be sharpening and have a gritty feeling in the oil, the will be particles of grit or metal. Wipe the oil off and start again. If you do want your stone to cut more aggressively, thin the oil with 10-20% kerosene. To clean a stone, use kerosene (paraffin) or similar and scrub it with a nail brush. That will leach the oil that's in there out, so you'll need to add lots to 'prime' the stone again. I know some carvers who will leave the stone submerged in slightly diluted oil overnight. And, yes, you need to keep the flattening stone unclogged as well. Even rocks need love!
Oops, I think I've penned a Country song...
| 16 January 2017 17:15
Chris I don't remember where in these video's on sharpening that you mentioned how to clean an Arkansas stone. I've tried washing it and rubbing with steel wool but it doesn't feel as rough as it used to. Can you mention it again please? Second, do you have to clean a flattening stone? I'm still doing the commissioning. Just when I think I have it I watch your video again and realize I have not made the inside bevel deep enough, but there is a wow factor here for I see how sharp the tool gets. I do fear though that my headstone will read poor sod she was commissioned to death!
| 05 January 2017 16:59
Karen - Grinders do vary in speed but they are usually around 2600, with 3000 rpm. You can find slower speed, sometimes hard speed, grinders and they are arguably more desirable as less likely to heat up the metal.
Commissioning: Just want to say (and possibly remind you) that this is a skill, but quite a discrete one. The more you do it, the better and quicker you'll be. So, well done. Keep going and it won't be long before you hardly even think about it; you'll just do it.
| 04 January 2017 19:55
Chris what are the rpm's of the machine/grinder you are using? If someone was to purchase such an item what should they be looking for, the range for rpm's?
| 04 January 2017 19:41
I've watched this video on commissioning 4 or 5 times now and each time I watch I learn a little more so it is back to my bench to work on commissioning as I found I'm not making the inside bevel deep enough. Thanks for such a great video Chris.
| 19 December 2016 20:10
I appreciate your explaining again the reasons for commissioning, this was very helpful. I must say there is a bit of a swagger in my step after attempting my first and seeing results even if it did take forever! Thanks again Chris.
| 19 December 2016 10:58
Karen - It's not really about squaring the edge, though you may well need to do it for that reason, but to see the white line (of light) on the cutting edge really clearly.
Do remember that although it seems we are making a problem for ourselves, when you add the inside bevel you are immediately working on the edge, on that white line - and the white line will thin quickly.
(On the other hand, usually you are working on the heel of the outside bevel. That's why we do the inside first.)
BTW - Congratulations! It may have taken you longer than you wished when you sharpened your first gouge - I'm sure it was the same for me - but you will get quicker and quicker as you know exactly what you need to do and have the experience to do it. And you only ever need to commission a tool once; after that it's maintenance. And that tool you have sharpened now has a lot of added value to you as a carver.
The shine comes as you strop and I've no doubt stropped mine more than you. So keep stropping (low cutting angle to the bench strop) as you carve and it'll soon come.
| 18 December 2016 17:50
Chris sorry to go on about this but I am having trouble understanding why it is necessary to take a brand new gouge and blunt the end when it is already square to begin with. Yesterday, it took me hours to commission a new Pfeil #5 20mm, I assume my lack of experience and I don't use machines. I have a very good, long, Norton stone, 2 ceramics and a diamond stone which serve me well and they take up minimal space in my small basement.
My other question: my bevel doesn't seem to get as shiny as yours does, so what would be the reason? I am getting a nice edge on my tools which has improved greatly from all I have learned from these videos, so thanks very much for that.
| 18 December 2016 09:50
Karen - Average for whom? Which stone? What happened to the grinder?
I'm not ducking the question but the time it takes to commission a tool so much depends on its size and shapel; the tempering of the steel; coarseness of the stone; downwards pressure of your hands; your technique and ability to monitor what's happening; the amount of oil; your energy at the time...
Actually, I am ducking the question!
I would allow about 20 minutes to commission a new tool, but it really does vary with size and shape etc.
I get asked similar questions about how long carvings take, and I do a similar ducking movement. I want to say that you shouldn't judge yourself by me. The really important thing is to enjoy the challenge, take pride in the achievement and know that practice makes familiar, and that eventually sharpening and carving will just become part of what you do.
| 17 December 2016 18:20
Chris when commissioning/sharpening a new tool using a Norton stone how long does it take to get the back bevel where you want it? Average amount of time?
| 16 December 2016 12:07
David - You're right, any abrasive will work. Do bear in mind that you can re-shape any slipstone on a grinder, benchstone etc. The thing about the sand sandpaper is that it is likely to wear out quickly, especially in the back stroke against the edge. But it's a great expedient and you should definitely have a go. Try starting a but coarser, say 120.
| 15 December 2016 04:27
Chris - I'm about to commission my first gouge, so here goes.... I don't have a slipstone to match this gouge (#6-20), but I'm guessing that any abrasive could work. My thought was to use a wooden dowel or other matching profile with adhesive sandpaper attached (320 grit or so). Do you think that would be adequate in a pinch?
Your videos are very thorough and abundantly helpful!
Dave
| 30 October 2016 13:59
Claudia - I don't use ceramic benchstones. The main reason is that I use the oil-based slipstones - because you cannot get the equivalently shaped ceramic slipstones. Any oil from the slipstone would inevitably transferred to the ceramic benchstone as I went back and forth between the two and would lubricate the ceramic surface, and inhibit its ability to remove metal. It's either both slip and benchstones have to be oilstones, or neither.
If you do use a ceramic benchstone, you must make sure it keeps free from oil. Around 7:30 you'll see me using the benchstone; use all types of benchstones in a similar manner.
| 28 October 2016 23:56
I watched the video about using a slipstone to shape inside the gouge. But it does not show how to use the ceramic (bench stone) to sharpen. How is this done?
Im confused.
Claudia
| 27 October 2016 11:08
Peter - Well done! Once you've used a correctly sharpened gouge, there's no going back.
Fishtail gouges are sharpened in the same way. You can let the inside bevel stop short of the corners as they are a little weaker than a regular gouge; and these corners are susceptible to overheating - be careful on the grinder.
Carving chisels are sharpened with a single, flat bevel on each side, at around 15 degrees.

| 25 October 2016 19:59
Chris, I have just commissioned my first tool, a Pfeil gouge and I must say, when I squared off the edge I felt like the day I tossed my puppy in the pool and she swam by instinct, fear was gripping my whole being. I must say the tool turned out spectacular. Performance wise, it is leaps above a non commissioned. My question is fish tails. Do you follow the same steps for fishtails, and how about #1 double chisel how do you improve those.
Peter
| 27 July 2016 16:27
Thank you.
| 27 July 2016 16:02
Alejandro - Life's quite short isn't it! I'll cut to the chase for you. Benchstones: Get a Norton Combination Carborundum, coarse one side, fine the other; also get a translucent Arkansas benchstone. These are what I started with, still use and for me have not been surpassed. Slipstones: The slipstone sets that have my name on are unique in what they offer: coarse Carborundum and translucent Arkansas at each width. Otherwise,gather them where you can.
This little collection will meet your sharpening needs, as they have mine, until we shuffle off and I believe are your best option. Get through the sharpening quickly and on to the carving!
As for grits: these stones have different crystal structures so we are not comparing like with like when we want to talk 'grit'. Rather like you can't really compare a cross-cut and a rip-saw. I can't go into this more her. Look at my book 'Woodcarving Tools, Materials & Equipment' volume 1. A web search will also be very revealing I suspect.
| 25 July 2016 20:59
PS and how do those words translate into grit?
| 25 July 2016 20:58
Hi. Somewhat of a repeat of the last question...
What's the difference between India, washita, course, fine, extra fine, extra extra fine, soft, hard, hard black, translucent, yada-yada-yada?
I don't know how to translate all of my options into an optimal purchase.
Thanks!
| 07 May 2016 06:48
Shane - These are the only two stones I've ever used: sort of 'shaping' and 'finishing'. A four stone system seems a lot of work but I would say that I've always had a 'combination' shaping stone which has a 'fine' carborundum side as well as coarse. It gives me a subtle middle option but, honestly, it's not not one I've used much .
With the coarse stone you can press harder for quicker metal removal, or press lighter for delicate work and for that last thinning of the while line before moving on to the finishing stone.
The trick to being quick with hand sharpening is to get that white line as thin as you dare on the faster shaping stone - in other words 90-95% of the total work - before going on to the fine but slow finishing stone.
| 02 May 2016 19:26
Hi Chris, are the only two "grit" stones needed are the coarse for general shaping and the Translucent Arkansas stone for the final sharpening? I know others use a 4 stage system. Are these the only two I need?

| 18 April 2016 08:14
Thank you Chris.
| 18 April 2016 07:42
François - 36/80 is coarse/medium, with 120 being the finest. 36/80 will do what we need. One important factor for us is that we use ony VERY light pressure - we don't want to overheat the metal. Most grinders are used semi-industrially where overheating isn't an issue and so harder pressure is often used. So, yes, modify the 80 wheel for the inside bevel - you can't do everything but you can do a lot of the bigger tools, which is where the time is taken with slipstones of course.
BTW. Here's useful article on grinding wheel grits:
https://www.georgiagrindingwheel.com/grindingwheels_basics.htm
| 16 April 2016 08:51
Hello Chris, what is the best grit for a bench grinder? When you buy one, there is a 36 grit and a 80 grit if I remember, I thought use the 36 for the outside bevel and the 80 for the inner bevel, what do you think about that?
Thanks.
François
| 10 March 2016 16:57
Justin - Have to say, I think you are right! My whole aim on this site is to demystify and take the anxiety out of sharpening, and carving of course. Sometimes I think that if I'd had these lessons when I started, I'd have saved myself a lot of time, effort and heartache!
| 08 March 2016 07:34
This video alone is worth the price of admission.
| 27 November 2015 16:58
John - Music to my ears! Thanks so much. I'd suggest you spread the commissioning out: commission a couple of tools, then use them; see how they feel; can you improve them. Get on with some carving, then commission the next couple, and so on. That way you can check you are getting it right and not repeating an error or oversight. All the best with your carving!

| 25 November 2015 23:36
Thank you Chris for your clear instructions for sharpening. I thought I was doing good until I used your method for commissioning. I just bought 4 Basswood boards today and cannot wait to get the commissioning done on the rest of my tools. I am looking forward to learning from you for a long time.
| 03 November 2015 00:51
Thank you so much, Chris!
| 02 November 2015 18:31
Mary - I believe the 6000 grit is something like the Arkansas I finish with but I can't say about the coarser grit for shaping. I don't actually use water stones because they wear too quickly, especially with our side to side rocking motion for sharpening a gouge: this of course presents the bevel to the stone as a narrow strip and quickly wears grooves, easily rounding or misshaping the bevel. Well, that's my experience but I'm sure there are many carvers who can prove me wrong!
| 26 October 2015 00:12
Hello, Chris
I just got my first set of gauges and have a set of Japanese water stones that I use for my woodblock print tools. Can I use these for the carving gauges? And could tell me what grit I should be using for shaping and sharpening?
Thanks so much-- I have been really enjoying and learning a lot from your site.
Mary
| 12 September 2015 17:47
Zachary - That's a terrific lesson; I'm only sorry you had to learn it the hard way! A lot of beginners won't take the risk but here you see me take a so-called sharp tool and completely destroy the edge - and then shape and sharpen it to be better than before. When you commission tools as I suggest, you need to prove to yourself that it's worth the effort. And once you have, and you practise, the quicker you'll get and the happier a carver you'll be! You commission once, then strop to keep the edge and, when you do, don't forget to strop at the low cutting angle.
| 09 September 2015 03:59
Hi Chris. I am a whittling "convert," and have really very much appreciated your material on this site. I recently dropped one of my palm sized gouges onto a concrete floor, and I am sure you can imagine what that did to the edge. I have never reshaped any tools... just stropped them. I purchased some stones, and it took me two attempts, but with your help I completely got rid of the damaged edge, and was able to shape it back perfectly, and it works better than new. I look forward to commissioning each new tool from here on out!
| 24 March 2015 20:28
Thanks Chris, i've had a go at sharpening a gouge the way you recommended and it seams to of worked very well. No hollow bevels. I don't think the wetstone grinder will take over from the bench stones just yet though.
| 24 March 2015 11:37
Mark - With a wheel, you need to present the blade at right angles to the wheel (ie in line with the axis of wheel rotation) and at the correct cutting angle, while turning the bevel from one corner to the other. If you present the blade stright onto the wheel (ie at right angles to the axis of its rotation) the wheel can't help but shape a 'hollow bevel'. This is a weaker configuration for us carvers as we use the tool 'bevel down'; although it works for bench chisels which have an additional secondary bevel and are used ' bevel up' anyway. Hope that's clear!
| 23 March 2015 21:02
Hi Chris, I use a Tormek wetstone grinder with a 10" stone to sharpen my carving tools. It seams to work very well.The only problem is it leaves the bevel very slightly concaved in shape. I've been told this is a bad thing for carving tools. Why would this be a problem? Some advice would be much appreciated, Thankyou.
| 01 March 2015 16:36
Rebecca - I'd start with the widest set, called 'sculpture' if I recall. The next narrowest set of slipstones is usually the next most useful. Just take one tool at a time and get it right; you'll soon speed up!
| 27 February 2015 09:10
Hi Chris, I'll definitely need to bear that thought in mind I think! I haven't started to commision my tools yet as I've been needing to buy slipstones. Can you recommend a slipstone set for sharpening my Auriou tools? As there's all different sizes of gauges and v tools I'm finding it a bit hard to work out which I would need to be able to sharpen the v tool and gauges in this set. Thanks
| 30 November 2014 07:28
Rebecca - Here's a thought about patience: I often have people say, 'You must be very patient'. But, actually, I don't think I am any more patient than most people. But what I am is persistent. So even when I've lost my patience, have had enough, am not having a good time - there is something in me that won't let go. I'll persist until I've completed the job, or it's obvious there's no more to be done. I think persistance a great quality for a woodcarver to have or develop, and a good way to think, especially if we are feeling impatient. As I said, just a thought!
| 28 November 2014 06:25
Thanks Chris, yeah looking at the cutting angle it does seem quite a bit higher than the ones in your videos. I'm really looking forward to starting woodcarving so better get started on the tools! But like you said I'll focus on one and make sure I get it right, it will improve my impatience! Thanks for your helpful reply.
| 25 November 2014 20:07
Rebecca - They won't have an inside bevel, even if it looks like it. All new tools need to be commissioned - it's just one of those things, and it does sort out sheep from goats. In most other woodcrafts it's much less of an issue. You CAN carve with the tools straight from the box but the cutting angle is likely to be too high and that inside bevel is missing - even with Auriou - and, for me, getting the right profile to the tool makes a huge difference, like tuning an instrument you've just got from the shop. But don't be put off; it's a skill and can be learned. Just take one gouge and do your best with getting the shape correct and the edge sharp. Try and convince yourself it's worth it! Then move on to the next. Remember you only need to commission a tool once, then you maintain it with very little effort. As for the V tool. it probably just needs 'touching up' on your fine stones, then a good stropping. I'm sure you won't need to give it the full monty.
| 24 November 2014 09:13
Hi Chris. I have my first set of tools, an Auriou Chris Pye set! Looking at the gouges it seems that they already have a slight inside bevel. Are they ready to work with or would you still recommend commissioning them? I have tested a couple out, but as I am new to this it is a bit difficult for me to tell if they are as sharp as they should be. The V tool definitely does not cut too well, it tears out the wood a bit. Just wondering if I need to start the daunting task of commisioning them all or if I can get away with trying to improve them using a slip stone and strop on the current shape. Thanks. Becca
| 15 July 2014 10:14
Steven - If I had a slipstrop for every width and sweep, I'd actually have a huge number, so what I try to do is 'cover bases'. You can use a narrower or more rounded slipstrop on the inside of a gouge - as with a slipSTONE - but have to move it around to cover all the edge; although, of course, the more contact between the two the more efficient.. I actually use a gouge 'upside down' to form the profile, sanding smooth and gluing on thin leather. Being thin, it hardly gives but a somewhat thicker, softer leather might as you suggest get you a better fit. (But not thick leather on the benchstrop as this tends to round the bevel.) I'd make a couple with your best guess on profile, use them, and it'll be obvious what others you need, or the number you end up with. Hope this helps. Glad you are enjoying the site - best of luck with your carving!

| 14 July 2014 23:47
Chris, I'm a new member and although I've been doing some decorative carving on furniture for several years, I've learned a great deal in just a day of your videos. Thanks for such a well-organized and insightful presentation. I do have a question about your large set of slip-strops. What method do you use to create them and get them to just the right arc and thickness? Am I overemphasizing the importance of this precision? Does the cushioning of the leather overcome minor errors in their shape? Is there a neat trick to their shaping, or just careful planning, scraping and sanding? Thanks
| 26 May 2014 23:50
For me Chris a key insight you present is that 95% of the process is "shaping." I seem to always think I will go on ahead and fix up any inadequacies in the sharpening and stropping, but of course, that is completely wrong. Get the final shape. Get the shape exactly right. Then start sharpening. A whole lot faster and easier.
| 23 May 2014 16:04
Kara - Yes, 'profound' is the right word! Pfeil have that micro-bevel, a little secondary bevel as you say. It's done in the factory to make the tools sharp but effectively increases the cutting angle. It doesn't matter what the tool is, who makes it, how old it is etc - you, as the carver, need to get it cutting at it's most efficient. This is my take on that, what I do. I suggest you choose one of your Pfeil tools and commission it step by step, just as I advise, and test it out. Remember, you only need to do this commissioning once.
| 23 May 2014 09:20
Excellent video Chris. I have to admit I knew about the inside bevel but I didn't realise how profound it was. I actually thought like a lot of my friends it was only a slight nick. It almost seems a 1/8 of the length of the outside bevel. Definitely see the advantage of the outside bevel where more metal is removed to lower the cutting angle. Luckily I have a few older ones I can practice on. I see in one of your books that Pfeil chisels have a secondary bevel on the outside bevel. Should I re commission these as well, or change the set up? I am willing to give it a try as chisels have so much more control when your hands are closer to the work.
| 18 May 2014 10:00
Ann - What's that phrase, 'Feel the fear and do it anyway'? It's not obligatory; you can go straight for the inside bevel, But the chances are, as a beginner, you'll end up with a wavy edge or the corners missing or 'winged'. You HAVE to remove that metal anyway when you make the inside bevel - yes? - so making a white line gives you a reference to work to. Sure, the edge looks hugely thick when squared off but, with a grinder especially, will thin very quickly as you create that inside bevel.

| 18 May 2014 07:39
Chris, why would a timid-trying-to-become-a-no-fear sharpener want to take a brand new tool that's sharp and straight and do the first of your commissioning steps of "re-squaring" the edge? Now that's what I call "scary!"
| 10 May 2014 14:09
Ann - 1) STROPPING: You drag along the length on the strop to avoid cutting into the leather. You could work from side to side on the strop but I think it would be difficult not to cut in with the corner of the blade. 2) NICKS in the edge: this will leave a 'snail track' of torn wood in the facet. The question is, does that matter? If, say, it happened in a wide, sculpture gouge - which would normally be followed by a rasp and never leave a finished surface in its own right - then I might ignore it; or perhaps sharpen the nick; so I'd end up with a sharp edge with a little notch in it. If, on the other hand, it's affecting what I want to do with the gouge - and mostly I'd feel it would - I'd need to repair the edge. And that means squaring off the edge again as you say; which is a bummer, sure. So the moral is to protect those cutting edges! 3) TIME: Yes, it can take a long time to sharpen by hand, especially with bigger gouges. Being competent and accurate with a grinder can cut this down by 90% so that's definitely worth exploring, including grinding the inner bevel. 4) LASTLY: Great questions, not at all stupid; it's really good to see you drilling down and as your carving and sharpening skills increase, you'll have more!
| 08 May 2014 05:47
Chris - I answered my own question about "healing a knick" by reading over better your handout. Is it possible that we're talking hours instead of minutes for a small, timid sharpener to get back to a real cutting edge with good bevels using only stones??!!
| 07 May 2014 10:45
Chris - two questions (which I hope make sense and aren't too "stupid": 1) why does one work from the side, horizontally, on a stone, but pulling longwise when stropping? Couldn't one also work sideways on a strop? 2) when your gouge gets a knick, does one go all the way back to your straightening step or is working on a stone enough?
| 03 May 2014 10:15
Chris - thanks so much: great didactics and close-ups, which help a lot. Maybe I'm ready to really "shape" with this video, including the inner bevel which I was always afraid to try and do.
| 21 April 2014 08:38
Pete - I don't think there is a hard and fast rule; whatever works best. The inner bevel is made by working on the EDGE in cannel; the outer bevel is made (usually) by working from the HEEL towards the edge. I probably favour this order. As long as you end up with a good shape!
| 19 April 2014 15:24
As always Cris an excellent video. To be honest I'm not sure if I always form the inner bevel first. Is this important? I seem (rightly or wrongly) to kind of work on both as I go through the process, sometimes one and then the other alternately.
I did my apprenticeship as a fine furniture maker in the early sixties and soon realised that even ordinary wood chisels benefited from just one bevel and have not used a secondary bevel for more than forty years. Incidentally my favourite set of bevel edged chisels were a seventh Birthday present and I'm still using them every day.
Love the site and especially the videos.
Pete