
How to find your background depth
16.01.23
Reading time 2mins
Here’s a truth about woodcarving, one I hope you'll never find out the hard way:
It’s quite easy to carve wood off. It’s a lot more difficult to carve it back on!
The particularly disastrous version of this is carving a relief background - and carving through into fresh air.
And it’s very easy to do: The workpiece is flat on the bench so it’s hard to estimate how much thickness you have and you are concentrating on the carving, lowering the background. As I'll show you below, it doesn't necessarily have to be a flat background you're after either and where starting again would be so onerous.
So the trick is to get into the habit of checking: NOT the depth you've gone to but THE THICKNESS OF WOOD YOU HAVE TO PLAY WITH.
I’m regularly surprised by how out I am in my estimation of wood thickness by eye, compared with what my depth gauges tell me.
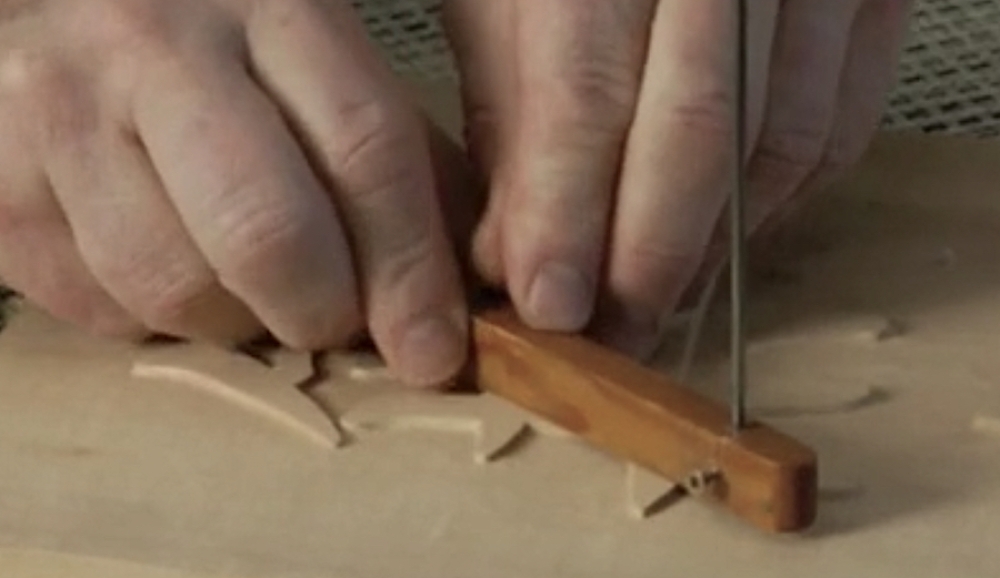
It's easy to make the assessment from the front of your carving using simple gauges, and you want to make it a habit. If nothing else it can also help you get your background level. You can see me working with one here on the 3 Hares Project.
Here are 2 of the depth gauges I use?
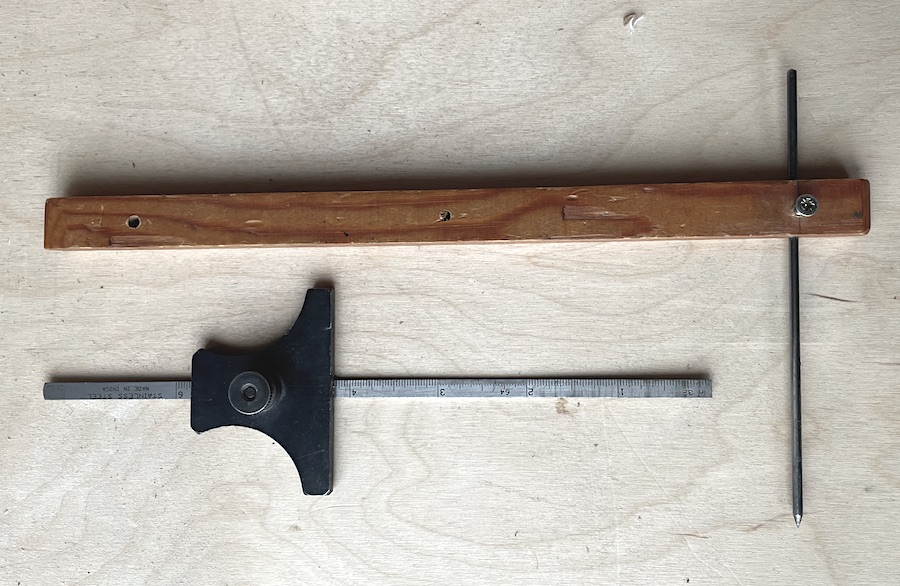
The upper one you can easily make (see link at bottom). The length of bar can be made as long as you like to reach the background area you are working on.
The lower one is a commercial, metal one; short but with a ruler rather than a point. Find by searching online for “depth gauges for woodcarvers” and look at the images.
Both these guages are used without shifting the carving. However, before you start, you must:
- Know the original thickness of the wood
- Leave a patch of the original wood surface (a 'witness') from which you can measure down:
But what about really big carving? One in which there is no surface left from which to take your depth reading?
In this case, you have to use the bench itself as the witness, the reference surface.
Here I am carving a shirt and need to check the depth at various points, such as how deep I can make the folds:
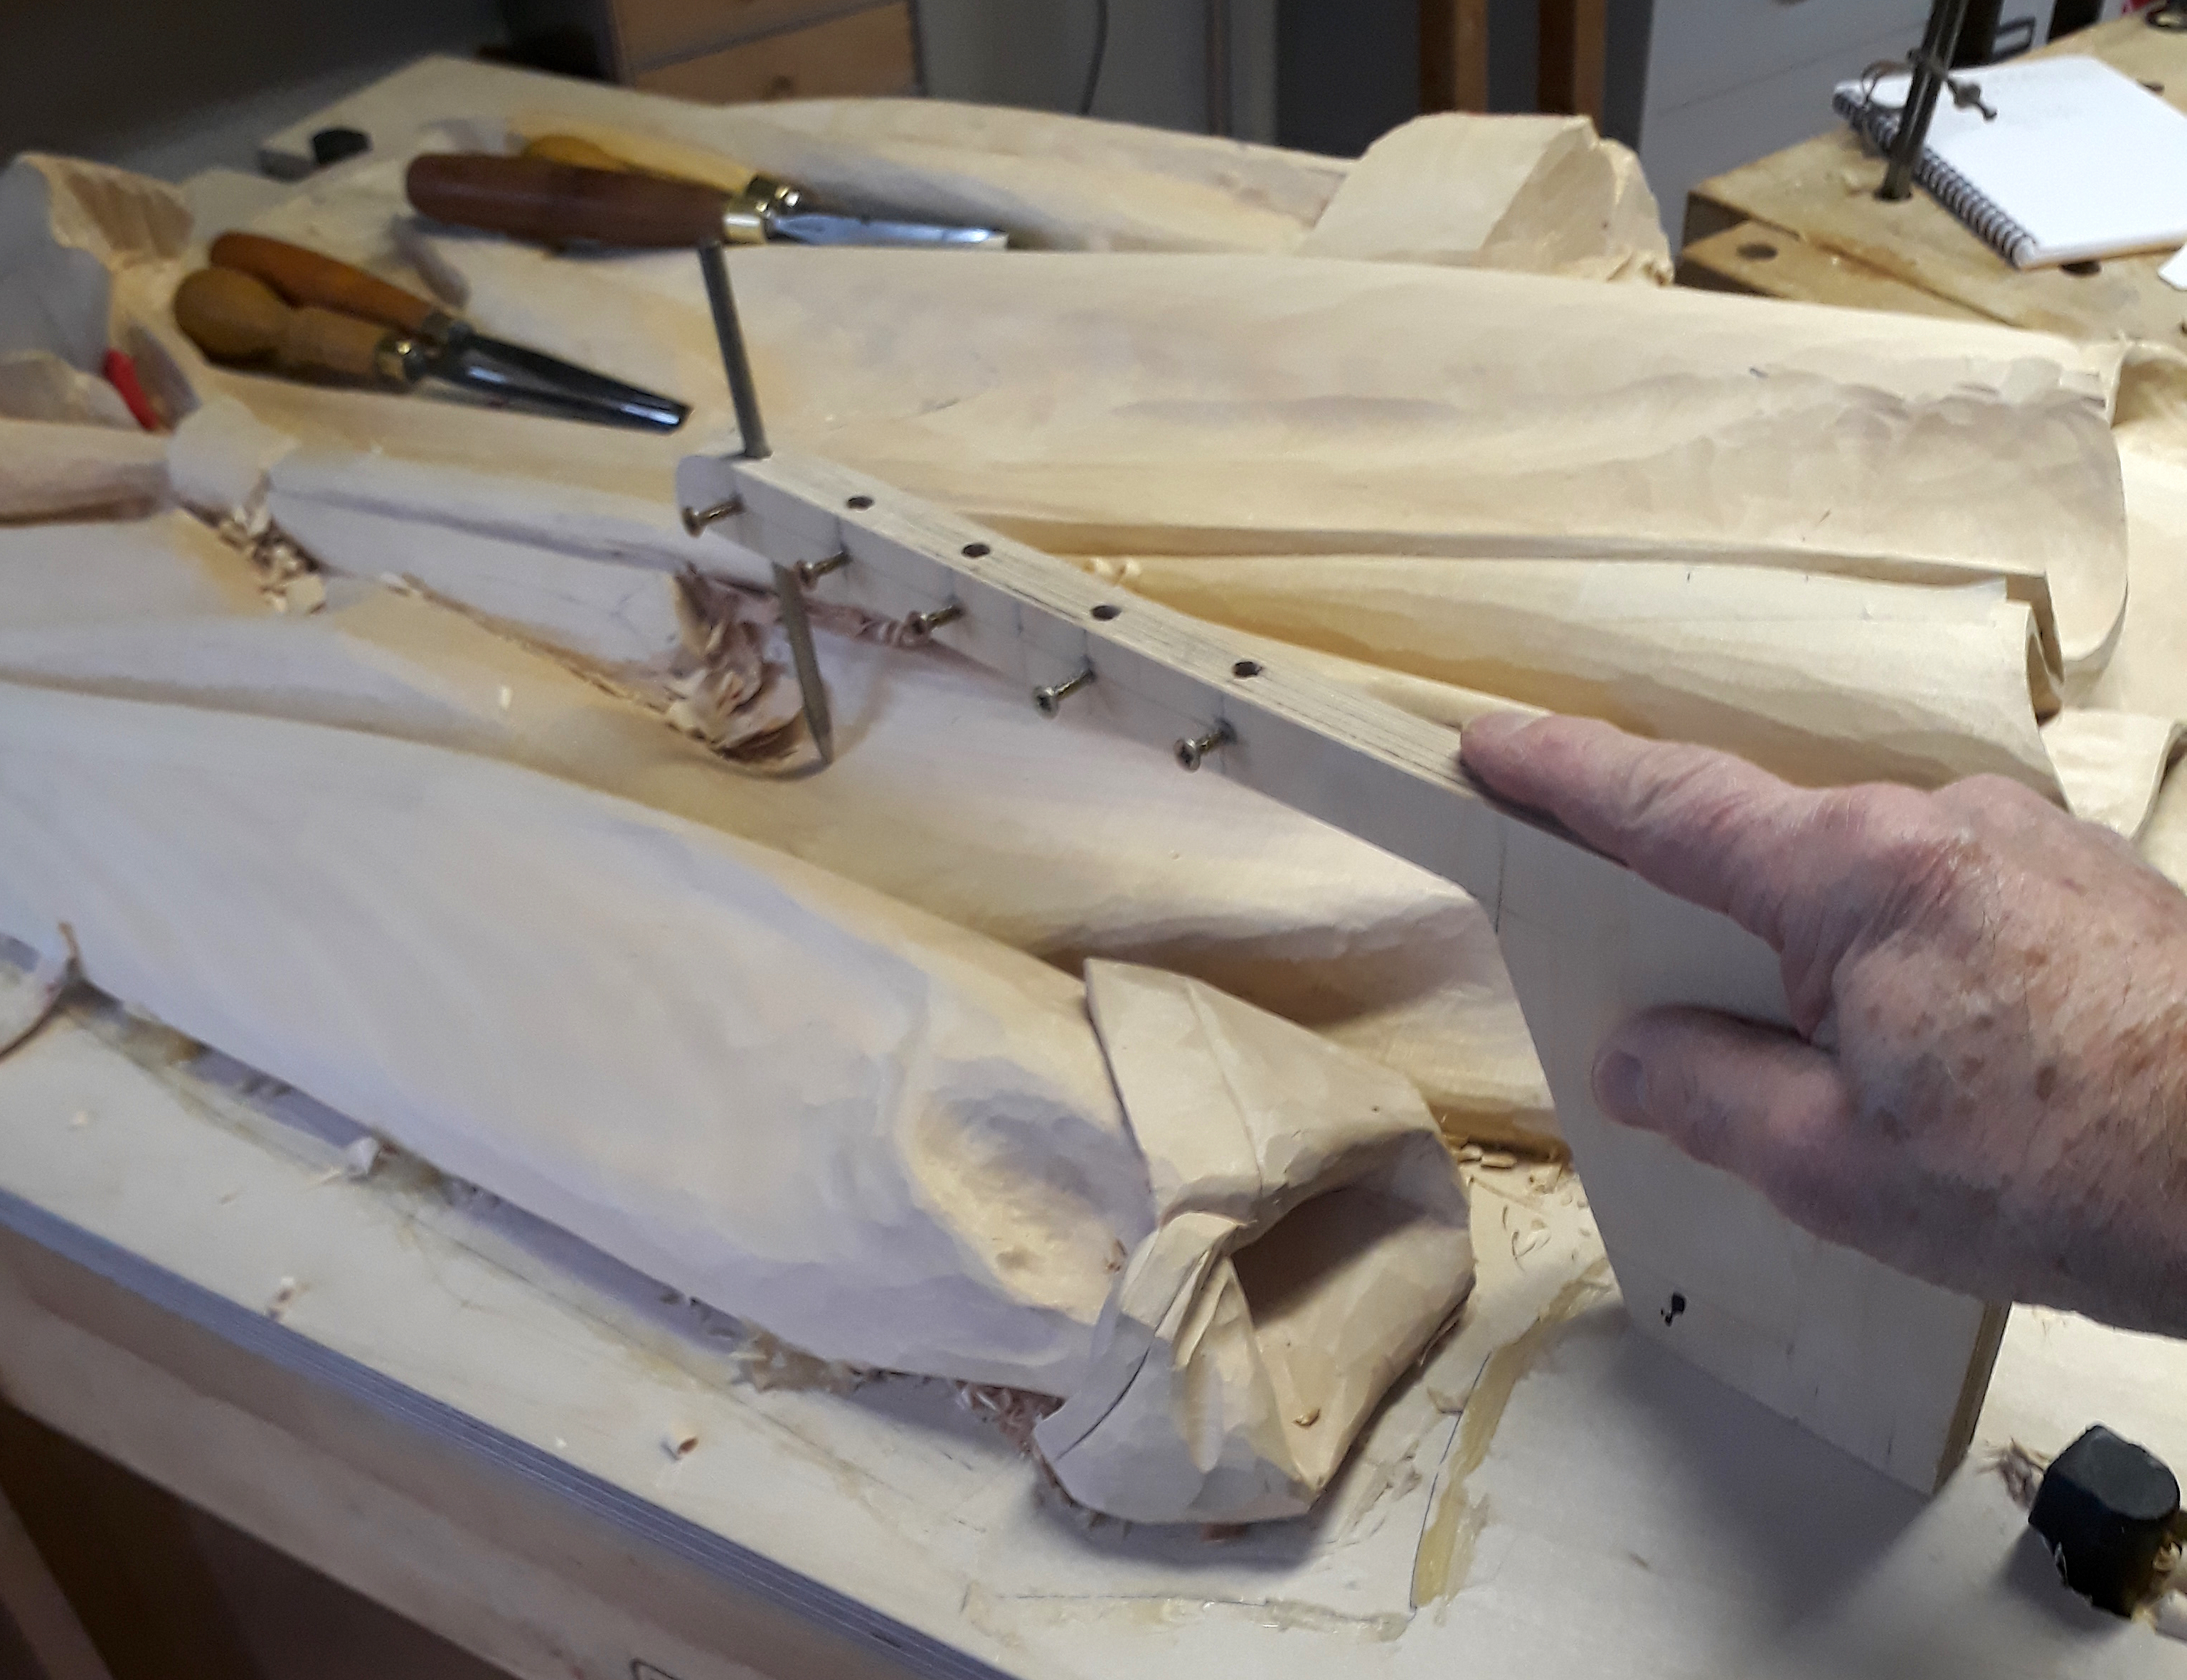
I have made a big hockey-stick version of the little depth gauge, with a series of places along the horizontal bar to take my depth rod. Note that the foot of the gauge sits on the bench, exactly in the same plane as the shirt.
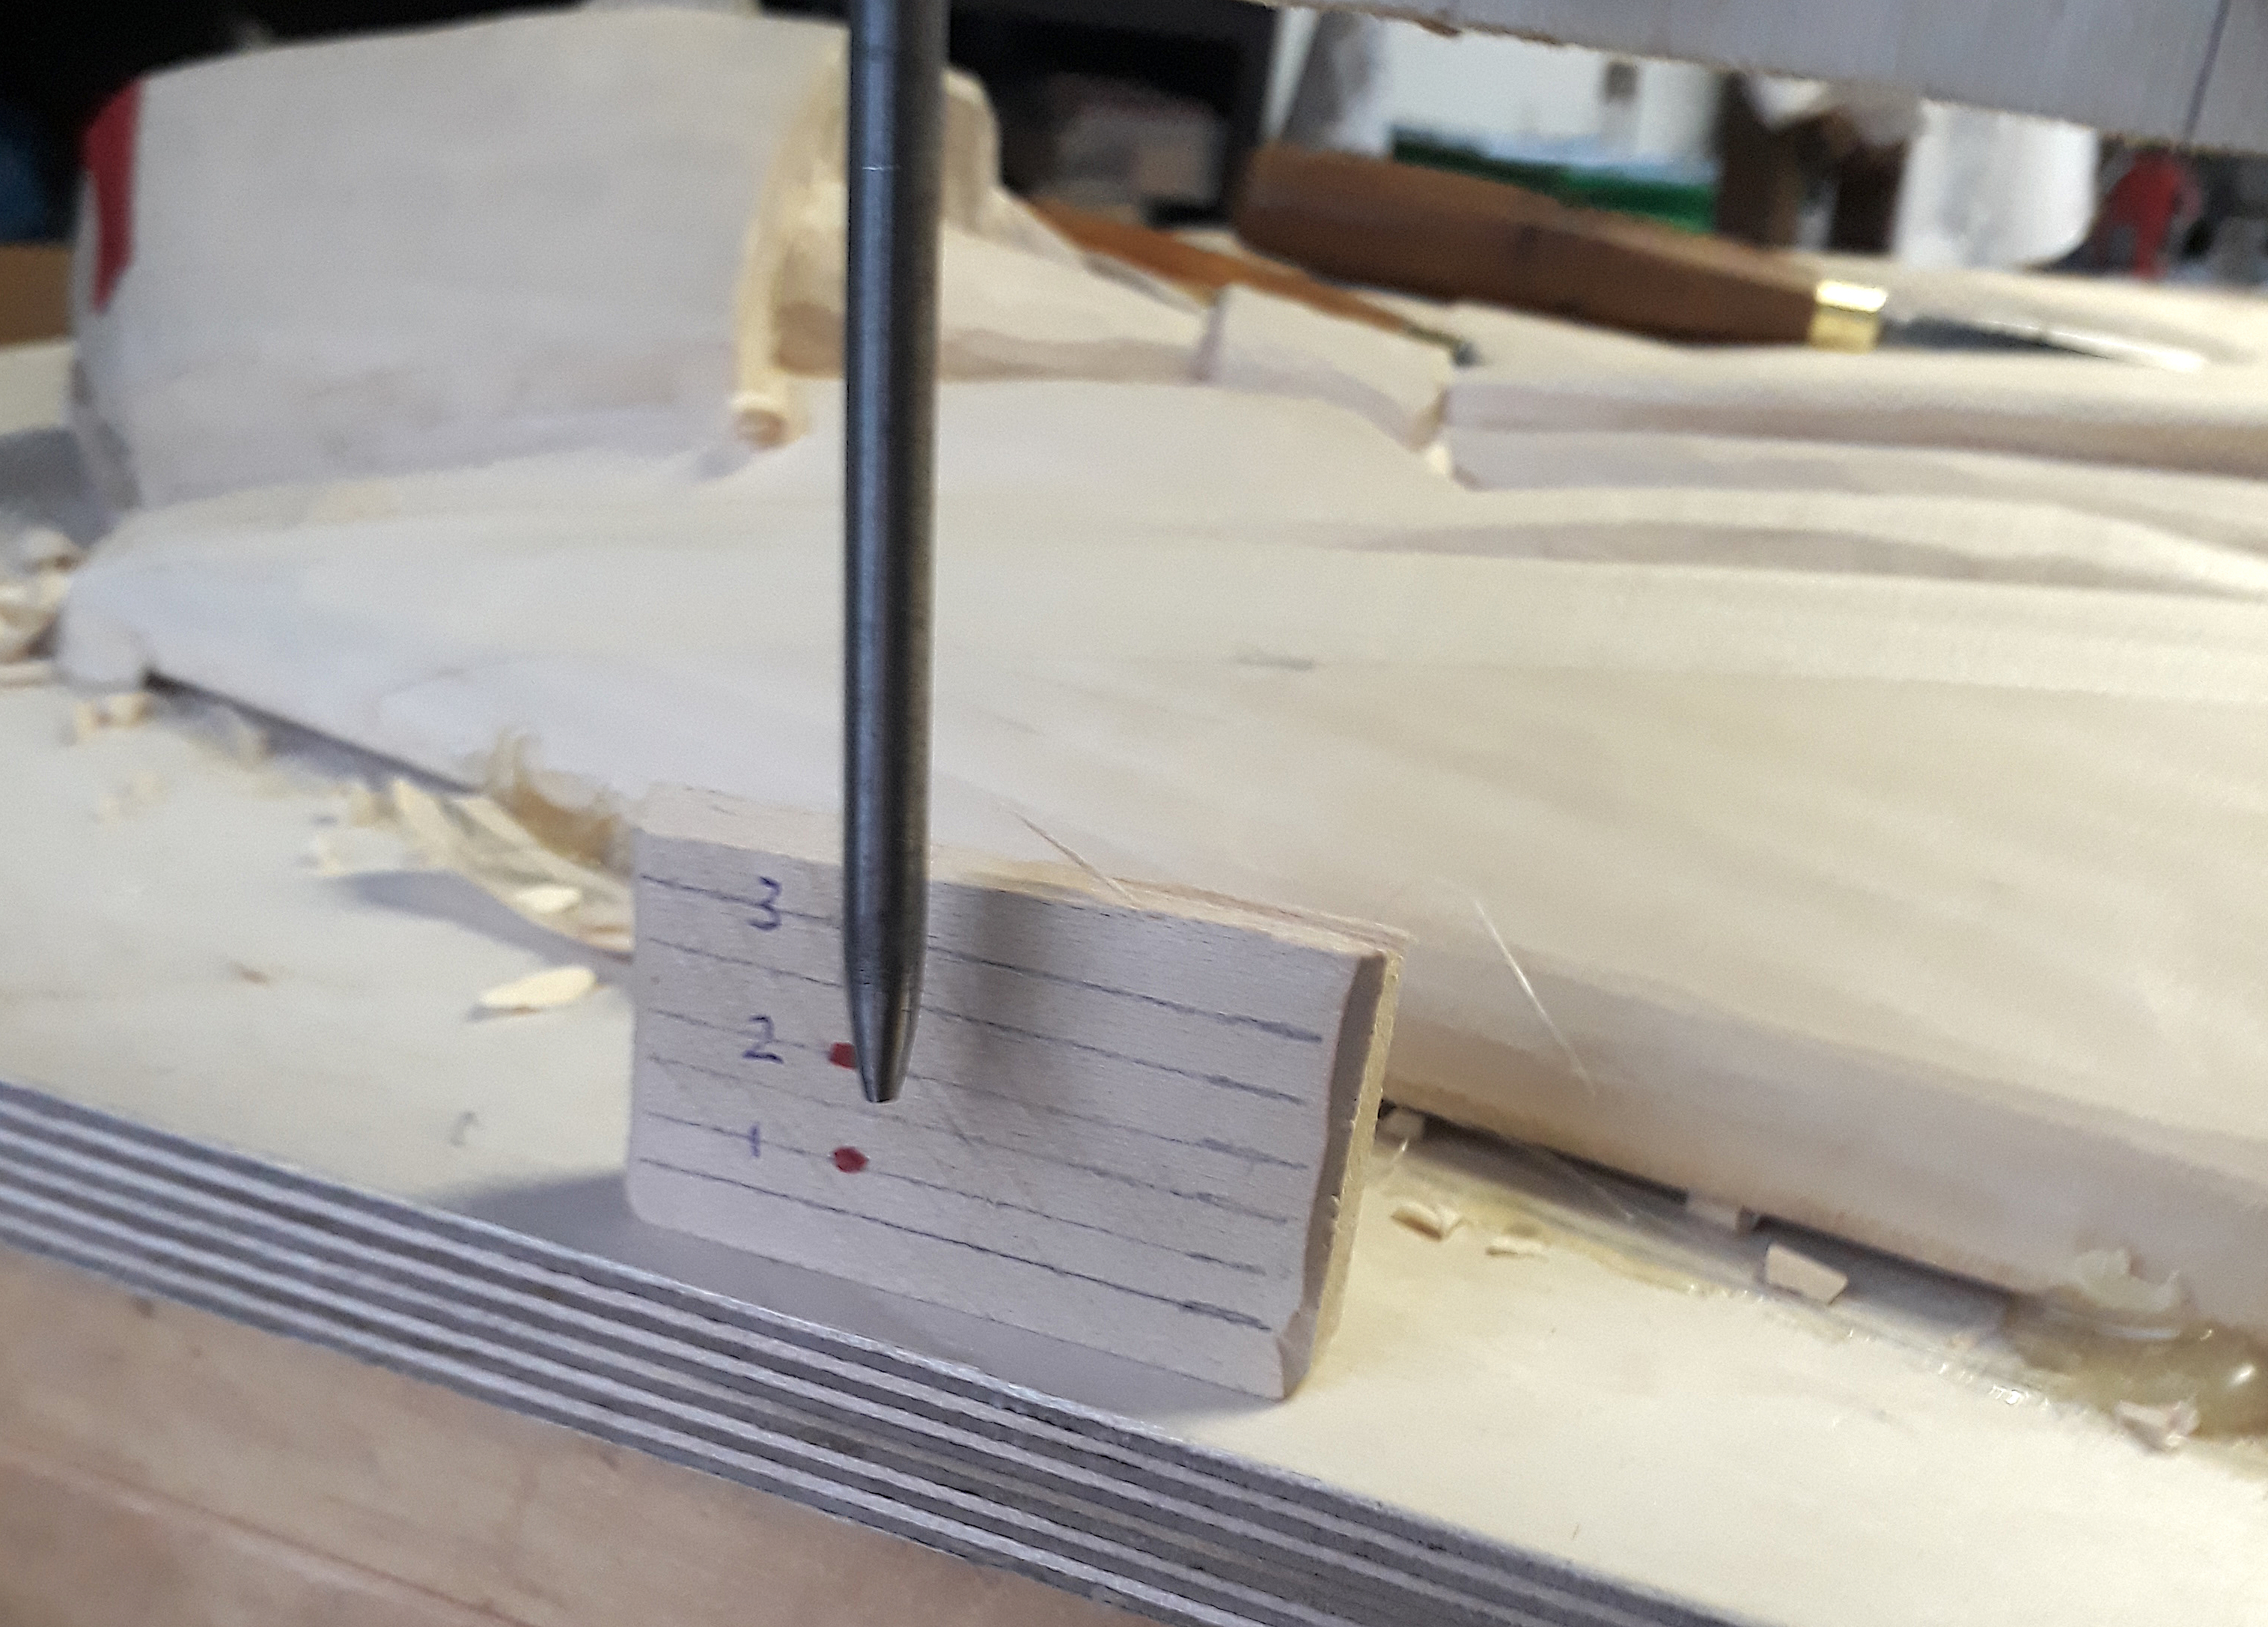
Now, still keeping the foot of the gauge on the bench, I check the distance from the end of the rod down to the surface of the bench. Sometimes I use a block of wood with depths marked on it to give me a numerical value, which I actually write in place on the carving...
I love making little jigs that cost nothing but really help my confidence and stop the BIG MISTAKE!
Related Videos: