
Undercutting. Get it right!
16.08.23
Undercutting... is what exactly?
Undercutting takes place in relief carving.
You remove wood beneath the edges of the viewable surface. So, for example, you've carved a leaf. You then cut at an angle underneath the edge of the leaf towards the background, which lifts and lightens the sense of the leaf by creating shadows beneath the edge.
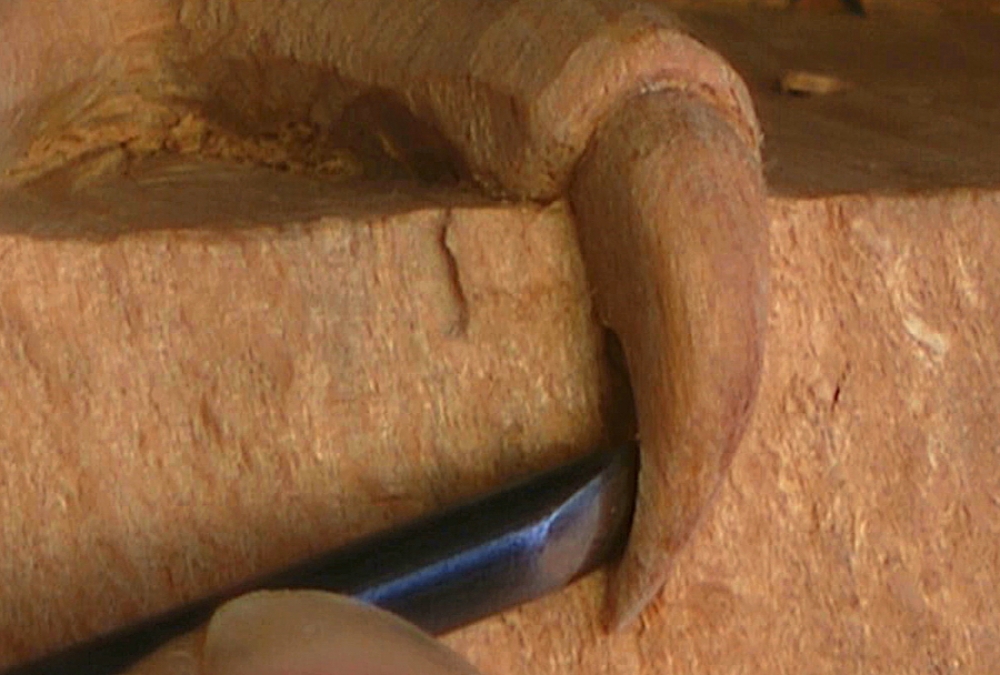
Or perhaps you're carving a claw, as here:
So, you are working from the front - as opposed to backcutting, where you can literally go around the back of a carving - and it would be a pierced relief - and remove wood from there.
You will certainly see undercutting in carving 'in the round', say where a sleeve sits on an arm. However, you can still think of that as a type of relief, with the sleeve like our leaf and the arm the background. And, at the end of the day, the sleeve will never be free from the arm.
Undercutting can arise as your carving tools naturally pass around a form, so you create a 'soft horizon' with space behind it rather than 'applying' the undercutting, so to speak.
Why undercut?
Undercutting creates shadow, creates drama; gives the illusion of lightness to the part and gives a sense of realism.
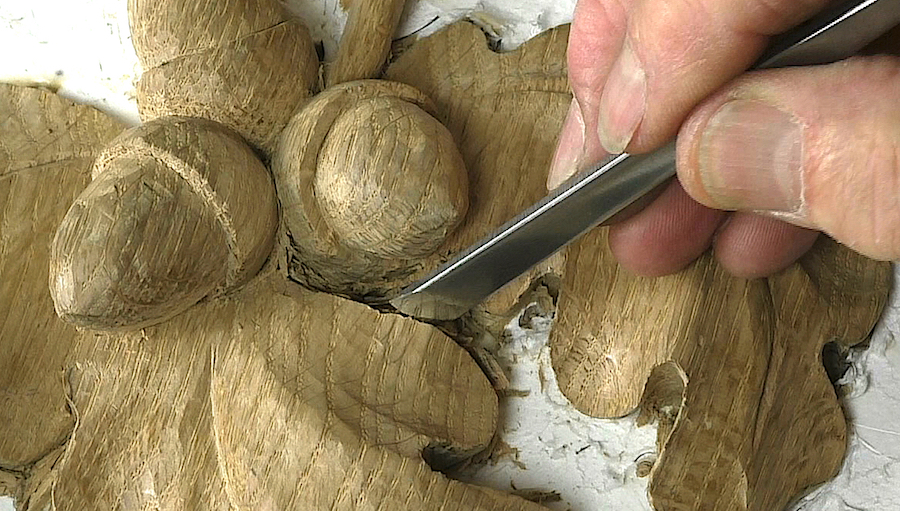
Carvers undercut a lot. You can see it happen in many of the projects on Woodcarving Workshops - just put 'undercutting' into the search box.
5 Good Rules to remember:
1 You can't carve space!
Yes? So make sure you have your surfaces sorted right to the edges. This is really important. If you've undercut your edge but later need to lower the surface towards to background, the edge suddenly disappears!
And it's why I always recommend saving your undercutting to last, certainly to the final stages of your carving when you are sure of all the forms and edges.
2 Have patience!
In a complicated carving, undercutting can take as long as the rest of the carving!
It also helps to have an adjustable carving stand so that you can get at the work comfortably and efficiently.
3 Think viewer!
From where will your carving be seen? Looking from below (high up on a wall)? From above (a fire surround)? Or straight on (eye level)?
To take the 'looking at from below' as an example: You would undercut more on the lower side of the carving and perhaps hardly at all on the upper side.
4 Only what you need to get the effect!
Undercutting weakens the carving - after all you are removing supporting wood.
Don't get carried away and make edges too thin. An angle down at 20-30 degrees is almost always enough.
5 Junctions!
People always look!
Take the trouble. Always make the junctions created by your undercutting as clean and tidy as any other junction on the surface.
Related Videos: