Menu
It looks simple but there's still a correct way of carving neat thumbnails - quick and efficient once you get the knack.
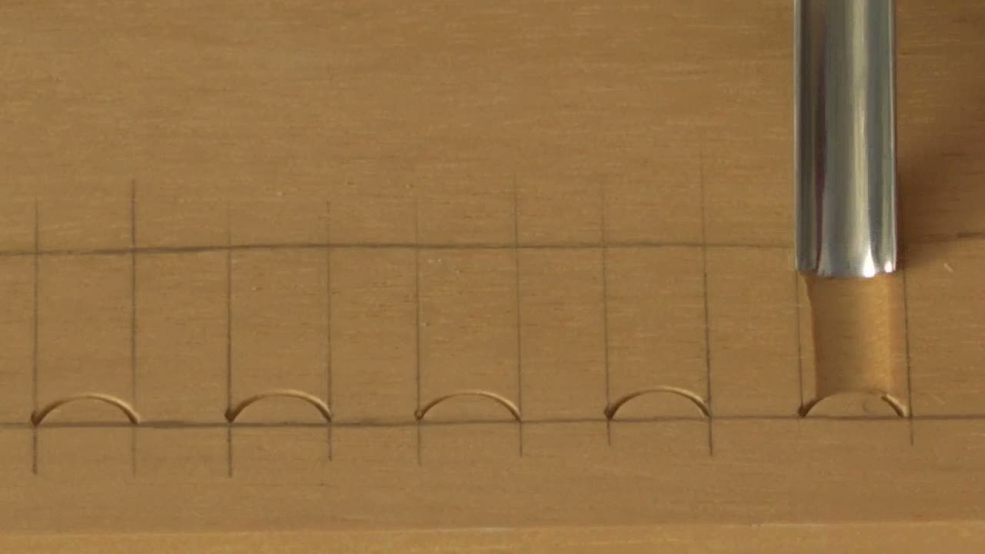
Careful layout is important!

| 23 February 2014 09:51
Jonathan - I suspect you are using too hard a pencil or pen and actually indenting the wood surface. If I use a sharp but soft pencil (HB - 2B), an eraser will remove the marks very easily and cleanly - a 'kneaded' art eraser is best. That's my preferred method. I do use a ballpoint sometimes, I don't press, so the ink is right on the surface and fine sandpaper removes the marks quickly. I never need to use a plane... I'm sure the softness and porosity of the wood also matters here. How about experimenting on some scraps?

| 22 February 2014 04:44
Chris---How do you usually remove the grid lines? I've experimented with sanding, planing, and even using alcohol at someone's suggestion. So far I like the result from a low angle plane with a very sharp blade. It can remove shallow detail however. I find sanding so tedious!
| 12 December 2012 15:45
David - Sorry to have missed this question. What you do is make a 'scoop' at the start of the cut: the handle drops quickly as the blade starts its forward movement. Thus the heel 'lowers' into the rounded end at the beginning of the cut, burnishing it. The important point here is to make sure the cutting edge is moving forward. If it isn't then you are simply levering and can splinter wood out.

| 17 January 2012 03:45
Ah! I just realized that you said at 2:40 to lower the heel on the gouge. That may explain why my center grooves are a bit puny at the beginning. Could you say a bit more on how the heel is lowered?
| 28 May 2011 01:29
I echo Karl Pister's comments. Your slow and repeated actions with comments and, very importantly, cautions have shown me where I have been making mistakes when following another thumbnail exercise given in a book by a different author. Thanks Chris.

| 17 April 2011 02:53
As a beginner, these details are "everything". I can see how this will advance my learning by magnitudes. What a treasure these mini-videos are. The books don't begin to approach what is needed for a beginner. This is genius Chris. Thanks.

| 13 April 2011 03:15
Nice, slow, and repetetive. This is where I see many instructional videos are lacking. They show it quickly once, and then show the completed project and are on to the next step. For novices such as myself, that is fatal. I very much appreciate the slow detail.