Menu
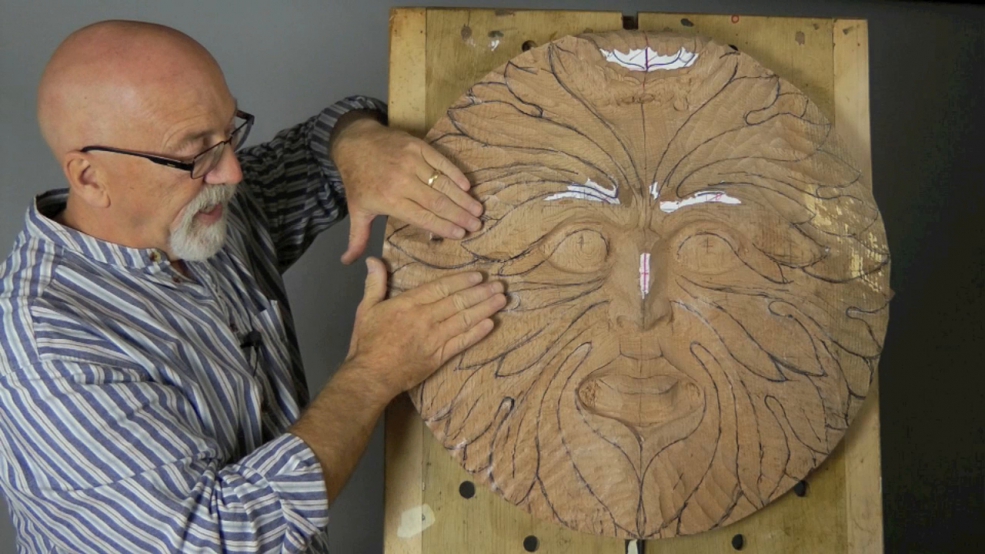
There are a lot of leaves! We have our working drawing so we can re-draw them over our prepared, shaped surface, keeping symmetrical as possible and then get down to sorting them out; separating and defining them. You'll see that I change mine from my original drawing (from my book) and you should feel free to do the same: if you feel some shape or form is difficult, you don't have the tools, it doesn't 'look right' etc - then re-design.
Here's a great tip: Design out your problems!

| 15 January 2024 09:18
Scott - I think the best option is the latter: drawing directly onto the wood. It's a waste of time to smooth the wood only to plough it up again.
(Having said that, you don't want the wood too rough; and it may be worth running, say, a spokeshave over the surface to reduce some of the more egregious ridges.)
So...
1 Finish off the outer edge: clean and circular
2 Mark on that edge and draw your centre line, top to bottom of the carving
3 Using your drawing, draw the points where the leaves touch the edge. mark on the finished side of the wood and work both sides equally by starting at the top center. These will always be good reference points.
4 Now, using masking tape for example, you can draw lines across the wood, leaf point to leaf point and, with the centre line, you will have created a sort of grid.
5 Grid up your drawing in the same way
6 And now you should be able to freehand the position of the eyes, leaves etc. pretty symmetrically.
Definitely keep that centre line as long as you can and use calipers to keep the symmetry, which is especially important in the face.
Don't worry about copying my drawing exactly as you carve. Once you get into the wood, the leaves will speak for themselves and, by arriving at the same points on each edge you will keep a sense of symmetry.
Hope this helps
Joy and success to your carving!

| 12 January 2024 22:11
Hi, Chris, I'm at this stage of the Solar Green Man (what an excellet project and excellent video series!). I will have to trannsfer the pattern back onto the roughed out carving next. Do you have any tips for doing this? I think the carving is too rough for carbon paper transfer, so options are 1) to smooth the surfaces out enough to get a good transfer, or 2) just do it by eye, aided by measurements taken off off the drawing. Is one of these a better option, or is there another way?
| 16 October 2016 10:25
Marshall - A 'knuckle' gouge is just a shortbent or 'spoon' gouge with a pronounced bend and is good for hollowing into deep, tight recesses. The thickness of the shank as such isn't too important; makers will generally forge the tool with the appropriate thickness for the work the tool will do. Generally I favour thinner tools but often these shortbent tools are thicker because the stress on them is greater.
'Knuckle' gouge is what carvers call these tightly bent tools but there is no real definition of what the bend should be in a shortbent gouge. Different manufacturers produce different degrees of bend, some quite slight (and frankly useless) to well bent, though the true 'knuckle' gouge is relatively rare. I've also seen different bends in the same version of a gouge by the same manufacturer - different batches and smiths presumably.
Thus you really need to look around at the profile carefully to see whether a particular short bent gouge will do what you want it to do. I cannot recommend a particular maker I'm afraid; I bought my own knuckle gouges a long time ago...
| 15 October 2016 15:34
Dear Chris,
In several of this Green Man project, you have mentioned the thick-shanked short bent (knuckle) gouge. How thick must the shank be to qualify for the title thick-shanked. I believe that Two Cherries (a German company) makes these, but it is hard to tell from the pictures how thick the shank is. Although you and I are probably not willing to try this with our own spoon bents, what would happen if you hit a normal shanked spoon bent with a mallet a lot?
Thank you for all you do,
Marshall

| 18 January 2015 12:36
"Getting down to Business!" - you, bet! I'm so thrilled to have this 2nd Green Man on your site - with your video skill progression and hopefully some progression in my carving skills, this set of videos is a treasure! I'm looking forward to following it in some approach to my second Green Man sculpture, solar or not. Thanks so much for all you both do.