Menu
It's a challenge carving something this large, but the process of carving is always the same. And result is often impressive.
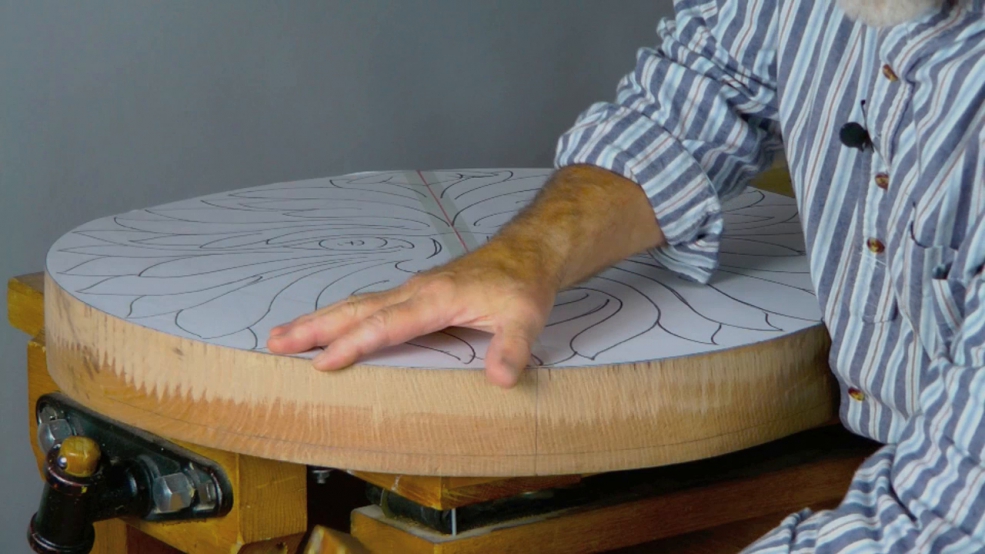
Wood: This carving is 24in. (600mm) in diameter and 3in. (75mm) thick, taken (unusually) from a single piece of Oak. I'll show and tell you about this beautiful timber in some detail and tell you when the acorn was planted!
It's very likely you'll need to join up wood to get these dimensions. Check out the videos in the Wood & Selection part of this website and where I join wood for the Hanging Shirt Project. Don't put a join down the middle - too noticeable - and remember to alternate the ring patterns in the boards for stability.
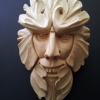
Pattern: In these workshops I'm carving a much larger version of my Solar Green Man that appears in my book: Elements of Woodcarving (GMC Publications ISBN13: 9781861081087). Do get hold of a copy and study the project: even though the carving in the book is smaller, you'll find the written approach to the process a very helpful addition to what's happening here.
In the workshops I'll show you how I used my printer/scanner and a window pane to enlarge and reverse the drawing. Although in the lessons I start with the pattern in the book, I change it! I must have carved this Solar Green Man half a dozen times over the years and each time I alter it, which is at least half the fun. In the download (link below) is the actual pattern I ended up with, taken from the final carving - my working drawing and tool list. Carve him any size you like.
And don't forget to add him to the members' gallery!

| 26 January 2017 17:32
That is a magnificent piece of wood. Wonderful.
| 30 December 2014 03:50
Chris, After looking at the video again I realize my mistake (should have looked before I wrote(leaped)). I'm considering using Sapele. I've carved it a few times and went okay, just have to source some thick pieces, and pick up a few short bent spoon gouges.
Thanks, Guy

| 24 December 2014 12:37
Guy - You see the board at the beginning of the project: I lay the paper on the surface and the fibres of the wood run up and down the face. (This vertical orientation is pretty much de rigueur for faces -and figures.) I cut my circle design out of the board a little way below the top end. The offcut from the top end was what we set flat on the bench and used to count and film the rings. So this is end grain: I'm looking across the growth rings of the tree as it had been cut down. JOINING: Any decent carving wood will do: Oak (in the UK at least) is very traditional and still available; Lime(Bass)wood, Sycamore; tight grained pine such as Yellow or Quebec; I've seen a lovely 'normal' sized version of this Green Man in Brazilian Mahogany, which had a warm deep red colour. I'd advise against Maples and Beech, but only because they are really hard work. Take a lot of trouble over any joining: colour and grain patterns; reversing boards; no centre join etc. You can't go back and change it!
| 17 December 2014 02:33
Chris, when you were counting the growth rings on the off cut, it made me wonder about the orientation of the grain on the piece you are carving, it's not end grain is it?
Regarding joining up pieces of wood to get this dimension, what type wood you recommend, or discourage?
Guy