Menu
The central protruding dome is called a 'boss', sometimes a 'button'.
Again, we have been here before and are forming this in a similar way to which the little boss is carved early on in the Corner Leaf series, but much bigger.

| 03 July 2018 14:09
Tomas - I think the best thing for you to do is break the rosette down into smaller units of work.
So:
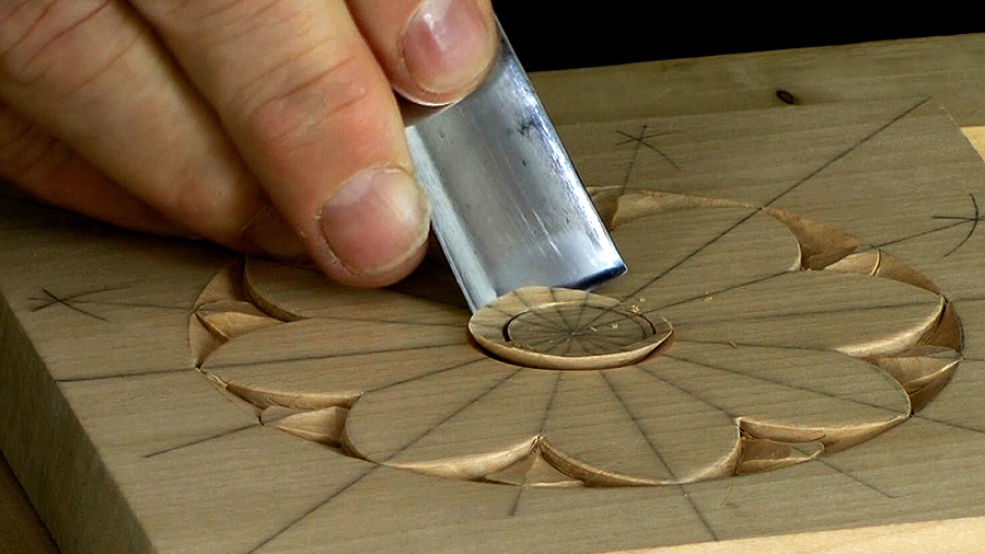
A. Start with the centre boss on your practise board. Draw out 20 circles and carve just that that circle - the one you can see me doing in the picture above - into your wood. Just that. 20 times. See what happens as you make the circle deeper.
B. Then round those 20 bosses over, as in the video. Some you can make deeper, some flatter. Which looks best?
Keeping repeating this until you have a boss that looks and feels right to you - you might have to do 100 - that's what practice is about.
It's not a matter of mm's; there is no hard and fast rule. How would you like YOUR rosette to look?
C. Now turn to the petals: Instead of going round in the circle like the rosette, draw them out in a straight line. 50 of them.
D. Carve the bigger petals - you should be able to carve these (and the centre boss) with regular gouges.
Go slowly and carefully with the cuts; make them equal as you go along, depth and shape. You can speed up later.
Are you tearing the wood? Why? Are your tools sharp enough? Are you using good carving wood? What happens if you make the cuts deeper?
Keep going, repeat the exercise, until you have rows of lovely, uniform petals.
E. Now carve the inner petals between the outer ones - remember the walls slope down to an inverted triangle; the walls between the petals are not vertical.
A fishtail is definitely a good idea here, to get into that deep corner.
Again, take it slowly. Try to make your cuts clean and equal. Critique what you are doing. Decide what looks good.
Did you notice that you are carving what effectively is a waterleaf moulding?
F. When you have completed the exercises, you can take your skills to the rosette, which should be straightforward now and look good!
The way I carve, and would wish you to carve, is without the need to finish by sanding. If your tools are sharp and your cuts clean and precise, your rosette will look good without sandpaper. But, of course, you need to practise ("A black belt is a white belt who didn't give up.") and you need to put your time in.
The good news is that these cuts are fundamental to ALL carving and you'll find them repeated throughout this site over many projects. So that time you put into this sort of disciplined practice is really an investment!

| 03 July 2018 10:51
Hello,
I have been started with training on rosette carving.
So far I have several attempts to carve the rosette and its separate elements on exercise wood, but I am still not satisfied with my achievements. Therefore, I am asking for the following advice:
1. Best results for outer petals I have got with the carving depth of 5-6 mm. A further deepening of the outer circle part has no positive effect. Then the connection between larger and smaller petals I get on 2-3 mm depth. Is it correct?
2. Is it possible to carve rosette with straight gauges only or it better continue with carving after ordering a fishtail gauge?
3. What is the total relief height in the central part. With 5-6 mm it looks a little bit flat, but when I trying to increase depth carving becomes unproportional.
4. Because of a very little experience, I am finishing the surface damages, irregularities and overcuts with sandpaper. It is a normal practice or I shall improve my skills before continuing with relief?