Menu
'Production carving' happens when you carve a 'run' of something, repeating quickly and efficiently, and usually to a price.
This series of videos is an example. A local furniture maker had to make 6 copies of a chair - a 1950's reproduction of a 1911 chair in the V&A - and my job was to carve the decorative elements. These 'elements' were either to be carved into structural parts before the chair is assembled. I was given the naked parts to carve - or standalone units to be 'applied' last thing when the chairs were complete.
Each chair had:
So lots of individual bits! I don't undertake this type of work much now, but it's the sort of thing 'trade carvers' would undertake, day in, day out; and carving not just the parts for six but for hundreds of chairs. In these lessons I hope to give you an idea of how you might go about this sort of carving efficiently and, as we've seen elsewhere, making direct use of the tools to create effects quickly.
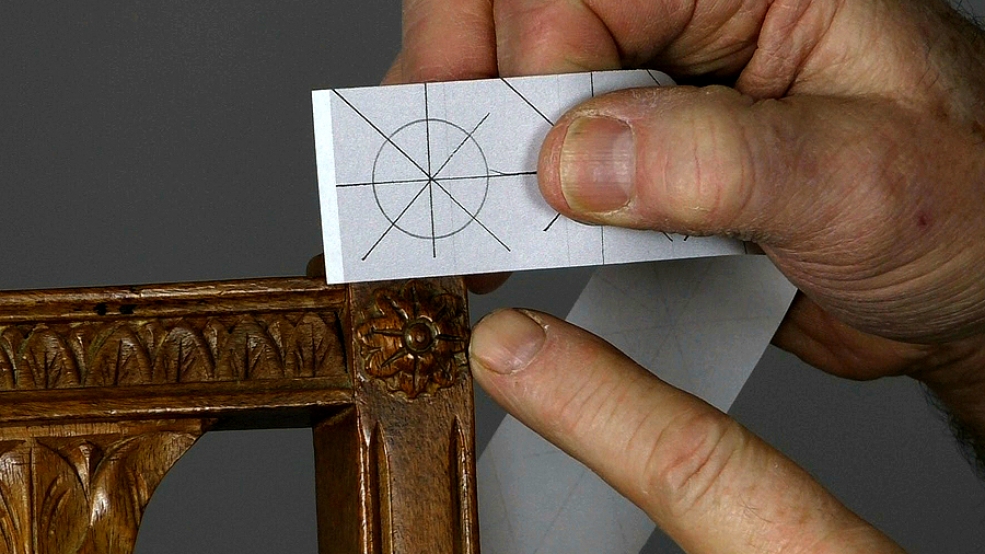
You can use the 'elements' that I am carving here on others things than chairs of course. I've put the tools I'm using along with the templates in a download (below), in case you'd like to have a go.
Many thanks to Guy Butcher, fine furniture maker and designer, for permission to show you the chair. His website is here: http://www.guybutcherfurniture.co.uk/. You can see the finished chairs at the end of the very last lesson in the production carving series.
NB. The patera in lessons 1-5 make up the first part of the whole chair project. Part 2, chair rail moulding and 'tulip' back splats, will appear in October 2017.

| 18 October 2016 13:07
Derek - it's Brazilian Mahogany, to match the original chairs as closly as possible.
| 18 October 2016 08:46
Hi Chris - Excellent instruction & execution as always. I'm just curious as to what wood you're using here, it appears to me to be mahogany. My apologies if you've mentioned/noted it elsewhere. Thanks
| 27 September 2016 12:52
Klaus - Thanks for reporting back. Very good indeed! I think you are right in that they probably look less 'hand-made' that when carved without using a lathe, but I can see that a lathe could really help here - if you have one of course. Now you have the blanks, I hope you'll carve them...

| 26 September 2016 22:32
Seeing I do more turning than carving, turning to the lathe comes naturally for me for round objects. I did a prototype on the lathe. I used a MDF faceplate, marked with two lines at right angles through the centre and mounted square blanks with double sided tape. The lines helped centre the blanks by lining up the corners. I marked the two circles (ball and outside dimension) with dividers. The outside diameter was cut with a parting tool which left a good finish. So no cutting with a scroll saw and sanding. The final shaping was straight forward. The whole operation including mounting took about 4 minutes. The finish was very good straight of the tools and required no sanding which is important as you don't want to carve sanded wood.
However after all this it occurred to me that the turned items might look slightly different than hand carved pateras and if you have both round ones and oval ones in the same project it may be better to carve them all by hand to get a consistent look.
| 22 September 2016 11:32
Klaus - There's a challenge! Trying not to be defensive here: You still have to cut out a very thin, round blanks and mount them on something to turn, and that takes a big proportion of the time. My indexing with a set square is plenty accurate enough carve them. Anyway, please have a go and report back.
| 20 September 2016 23:03
If I had to do this I would turn the blanks on the lathe and mark the divisions with an indexing device. I think it would save a lot of carving and help with the central boss to prevent breakout. I also think it might help with size consistency.
The oval patera are of course a different matter.
| 20 September 2016 01:29
Bill - Yes, exactly so.
In this case (and usually) I orientated the grain of each patera along the length of the backing board.

| 19 September 2016 17:30
Even though you didn't mention it specifically, I assume you glue the parts down with the grain running in the same direction. To ensure a consistent cut and not have any surprises along the way.