Menu
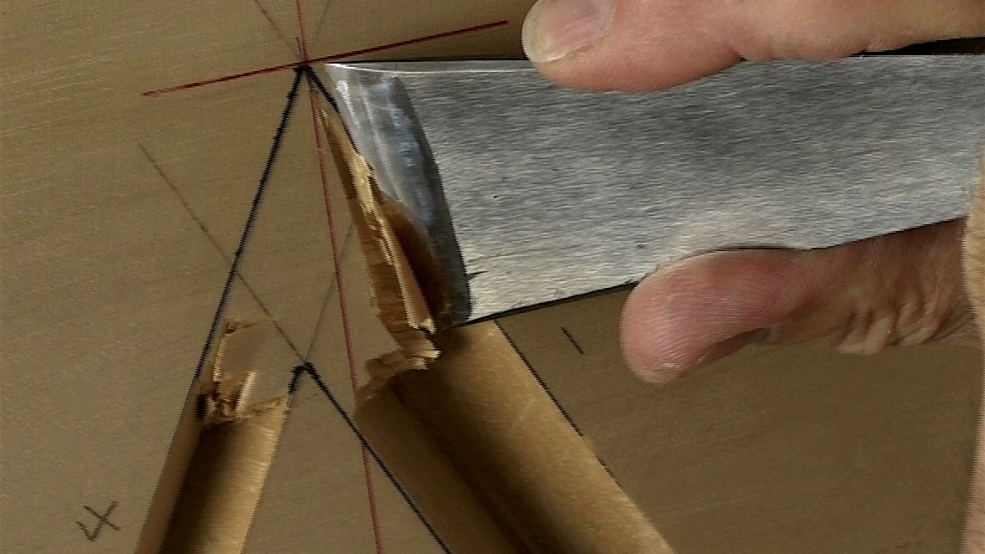
In lettercarving, junctions are the pointy bits; what you find in an M, A or V for example. In this lesson, I ask you to make a standalone junction and make it big. Really big.
You wouldn't normally be carving on such a big scale and there's a lot more wood to remove but carving is a lot about visualising, and pulling out this element of lettering really gets you seeing and understanding what a junction should look like - and there is something it should look like.
I'll take you step-by-step through a failsafe way of carving the junction, a method I've worked out that protects the delicate ridge in the middle. That's a problem: the ridge. It's very easy to break it off as you carve a junction and it's very difficult to carve back on...

| 25 October 2018 02:47
Chris: Many thanks for this lesson – I’ve had occasional problems with the ridge popping off, and seeing the process on a larger scale helped me understand why.
Even when it’s protected, sometimes a small piece of a ridge will come off with the slightest touch of a chisel. By applying color-matched wood filler and shaping it with the chisel when dry I can reconstruct the missing piece without it being noticeable. Not ideal, but it beats having to start a project over from scratch.