Menu
1747 from Woodcarving Workshops on Vimeo.
You've just watched Woodcarvers Screws
More videos from
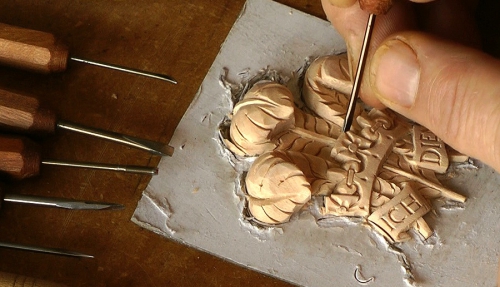
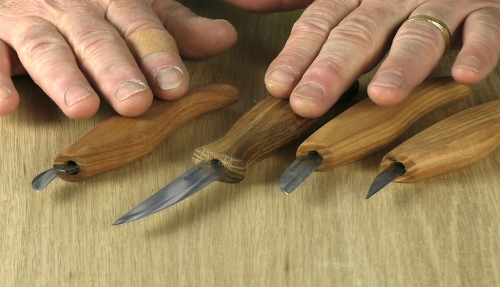
Simple, elegant solutions to many problems of holding carvings. You'll see woodcarvers' screws being used in many of the projects on this website.
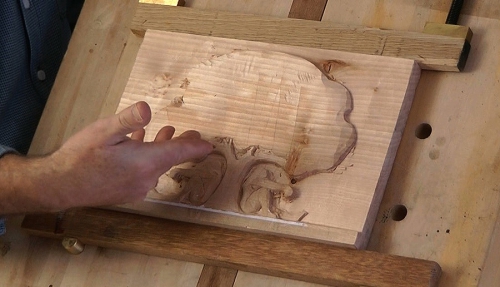
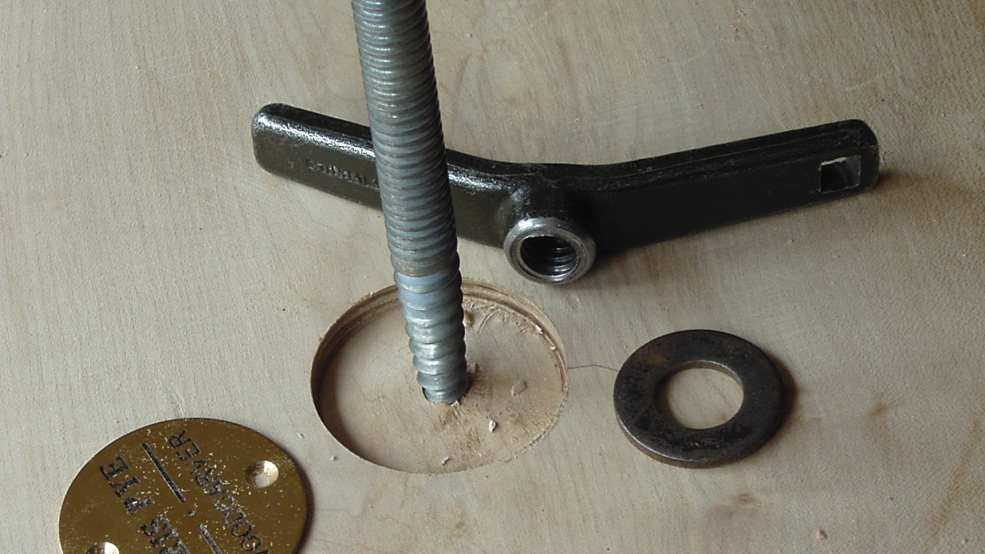
It's a basic principle in woodworking that you don't screw into end grain: the metal threads simply cut the wood fibres and the screw pulls out. You always screw into the wood across the fibres, so the threads grip.
I'm demonstrating 2 fundamentally different carvers screws in this lesson:
These 2 woodcarvers' screws compliment each other and between them can hold a huge variety of work.

| 19 January 2017 18:29
Just want to say thanks for the info you provided here for me Chris. I doubt if I can purchase at Stubai screw in Canada but I will certainly look for it in the future. Also I want to thank you for the info on how to clean the Arkansas stones, the kerosene worked like a charm. The only problem that I seem to be having now is that I seem to doing more cleaning, at had hope to avoid it!

| 19 January 2017 16:26
Karen - The only screw I know of that will grip into end grain is that made by Stubai; it has a fat thread that just binds into the hole, unlike the sharp-edged Veritas screw which cuts the files and pulls out of end grain.
However, all is not lost...
1. Drill the hole for the screw into the base of the carving.
2. Tighten the Veritas screw into the hole but then unscrew it again.
3. Put some wood glue into the hole.
4. Tighten the screw back in, unscrew it again.
5. Wash/wipe the glue off the screw
6. Leave the carving for the glue to dry in the hole - say overnight.
7. Repeat steps 3-6
What you have done is bind all that end grain along the screw hole with wood glue. Hopefully, and without a prayer in sight, that should be enough to let your Veritas screw grip without cutting the fibres and pulling out.
| 17 January 2017 16:21
This video was very helpful,I love learning about simple ways to achieve what you want and you seem to know all kinds of cools stuff. I wish I had seen this months ago before I started my present carving. I have sort of put myself in a situation Chris. My carving started out as a simple relief and somehow turned into a in the round carving project, another angel. In this video you said that you can not drill into the end grain of wood, but I also can't place a Veritas carving screw in the angel's back without ruining the dress and I still have to add feathers to the wings! Rather difficult when holding it in one hand, although I have managed so far. Any suggestions to get me out of my dilemma other than prayer?

| 16 October 2016 14:01
Dear Chris,
First of all, thank you for the quick reply! The wood I was using is curly maple, which is a figure found in soft maple. I will be sure to follow your advice and finish the carving.
Thanks again,
Marshall
| 16 October 2016 10:07
Marshall - You don't say what wood you are using but that might be a factor - softer wood fibres tend to break off and the screw certainly works best in hard woods - I use in successfully in good quality Oak or Lime.
Putting that to one side, it may be you were making the initial hole for the screw too big? The Veritas screw is quite short and you needn't taper the hole as you might with the longer Stubai screw.
Bore a hole just as wide as the the narrow tip. (I usually choose a drill bit by eye but I'm sure Veritas has a recommendation on the packet.) You should be able to screw into the hole so it's tight about 1/3 to 1/2 of the thread length. Then you can tighten up any slack that develops from the push and pull of carving.
Couple of other thoughts:
You can start again with your hole by plugging it with a dowel: whittle and sand one slightly tapered to the hole size and tap in snugly with wood glue. The re-bore.
If you find the wood fibres a bit soft and the screw not gripping, you can try putting a bit of wood glue into the hole as an expedient. You can let the glue dry first or actually insert the screw and let the glue bind all together. The screw will still unscrew and you may need to clean up the thread later.
| 15 October 2016 15:02
Dear Chris,
I have a small relief carving that I want to carve, and I have put the smaller Veritas screw into the back. (The back is not end-grain, as you have recommended)
As I was working on the piece, the screw got very loose. After screwing it in tight a third time, the screw came out. My question is, what did I do wrong in putting the screw in?
Thanks in Advance,
Marshall

| 17 April 2015 13:56
Another "Sudoku" sharing, in honor of Chris' challenge to keep thinking and trying: I needed a very stable, lower but flexible approach to some high relief pieces. As I thought about it, with a second Veritas carving stand plate, I had a metal worker thread it for me. Now I can use it in the carving stand when I need angling, but I can also put it down through a doggie hole and bolt it as if it were a carver's screw but in a context where I would never have enough wood for that choice. Thought I'd pass the idea on...
| 02 September 2013 10:53
Ann - Ah, bark. You didn't mention bark! I think the hot glue would indeed damage it. How about clamping it down to some sort of sandbag, or blocks shaped to the irregular back? Woodcarving is better than Sudoku for keeping the brain active...
| 01 September 2013 18:08
Will hot glue stick to without damaging the bark-covered back side of the piece? And maybe only God knows what hot glue is going to be in Italy!?! I think the carver's screw will work for the upright first round of carvings, but your trick or another is going to be necessary when I need to finish it's face with relief techniques...
| 01 September 2013 14:03
Ann - A method I've successfully used is hot gluing a block of waste wood to the irregular back and screwing to that, or holding it in a vice. Hot glue does not penetrate the wood but gives a strong 'tack', which you can build up. You gat release the cold glue with a chisel or warming it up with a hair drier.
| 20 August 2013 09:46
Chris, I have an odd shaped piece of wood, 40 cm wide by 20 cm high, irregular shape, that I obviously wood like to carve in a sort of high relief. It is flat on the bottom (end grain) but irregular on it's back. It's a natural piece of a log. Can I use a Stubai screw? Do you have any other suggestions for holding it?
| 05 July 2013 18:11
Hugh - Dieter Schmid is a German source of Stubai carvers screws that will ship across Europe: http://www.fine-tools.com/spannsto.htm. Try a Google search and you'll find a few other distributors.
| 04 July 2013 15:55
Chris I love all your vids all very informative and inspirational, could not find this type of screw for sale in the uk so I just spent a couple of hours making one in the workshop it works well. Many thanks Hugh
| 30 May 2012 07:47
Anastasia - Normally, as I'm sure you know, you can't screw reliably into end grain; the screw thread cross-cuts the wood fibres as it works into the pilot hole, and the screw itself will pull out. The Stubai screw, however has a unique fat thread that just crunches and binds into the pilot hole, and works extremely well in end grain - so that's the one you need. I love it. The Veritas and all other carvers screws are really only effective for screwing across the grain. Stubai, though a bigger item, will do both cross and end. Besides carvers screws, a common way to hold carving is to design in a longer base for gripping in the vice, cutting the extra length off when you're finished. Hope this helps!

| 27 May 2012 19:32
Chris, this video is very helpful, but I have a question about not screwing into end grain. I understand why, but what do you do if the end grain is the only place that you expect not to carve, for example with a "vertical" carving that you'd like to hold at the base? How would you secure the carving in a case like this?
| 16 November 2011 17:19
Bill - wrt your first point: the smaller Stubai screw, which I show here, is probably the most all-round useful and will certainly hold a life-size carving of a human head, so that would be your first choice. Regarding tool and jig specifications: thanks for the reminder. I do indeed try to bear these things in mind and give what I hope is enough information but, if I'm remiss in a particular lesson, that's in part what these comment boxes are for! As for sources, putting aside the fact that if I recommend one make or distributor, others complain, I actually haven't time to track things down. We have members from all over the globe: Israel, Argentina, South Africa for example, and it would only be fair to help you all. So I must leave it to you to source tools locally.

| 14 November 2011 23:09
Dear Carrie (and Chris). Just looked at the Stubai carver's screw video. It was just what I needed as I'm about to move into three dimensional carving. Thanks! While the video was fundamentally helpful in many ways, there is a point that I'd like to mention in general -- lack of specification on tools, jigs, and equipment that is talked about in the videos. The Stubai video, for example, did not tell the uninitiated which screw would be most useful or where the cutoff between large and small screws would be vis a vis the size of the art work. It did not identify the metric size of the screw demonstrated. Bottom line, for the average carver of, say, a life-size human head, which one is most appropriate? If I could only get one Stubai screw, which would it be?
There are many styles of teaching: Chris can tell you that I am one who likes the nuts and bolts of the subject. I'll admit to being a literal-seeking individual. Unfortunately for me, Chris seems to be at the other end of the spectrum, in many instances giving scant detail about measurements, design of jigs, tools, working tables, and product description. Consider having a link to more description or sources embedded in the narrative that accompanies the video for those who desire to learn more before they order equipment that they know little about.
Best wishes, Bill Solberg 310 709 3453 in Los Angeles.